Baking Essentials Tips: Your Guide to Bold Baking
Key Takeaways
- Mastering the basics is crucial for successful baking.
- Reliable tools are essential when baking under pressure.
- These tips help boost your confidence in the kitchen.
- They are useful for both beginners and experienced bakers.
- Applying these essentials can elevate your baking skills.
Table of Contents
- Baking Essentials 101: Must-Know Foundations for Success
- The DI ORO Approach: Essential Tools That Make Baking Easy (and Healthy)
- Advanced Measurement & Mixing: How the Pros Make Every Batch Better
- Baking Pans, Mats & Prep Surfaces: Choosing, Using, and Troubleshooting
- Temperature, Timing, and the Dynamics of Doneness
- Real-World Baking Scenarios: Solutions to Everyday Problems
- Level Up: Creative and Seasonal Baking Ideas for Aspiring Home Chefs
Baking Essentials Tips: Your Guide to Bold Baking
Great baking starts with understanding your fundamentals, and having tools that won't let you down when the heat is on. Whether you're tackling your first soufflé or perfecting a holiday showstopper, these baking essentials tips will transform your kitchen confidence from "what if" to "what's next." For a smarter kitchen setup, consider adding a space-saving silicone drying rack to your arsenal for easy cleanup and efficient prep.
The difference between amateur and accomplished isn't just technique, it's knowing which ingredients actually matter, how to measure like you mean it, and why your spatula choice could make or break your batter. Let's dive into the foundations that turn kitchen experiments into kitchen triumphs. If you're looking for a deeper dive into the must-haves, check out this baking essentials guide for more expert advice.
Baking Essentials 101: Must-Know Foundations for Success
Core Baking Ingredients & What They Do
Every ingredient in your pantry has a job, and knowing their roles prevents disasters before they happen. Flour provides structure through gluten development, while fats like butter create tenderness and flavor. Sugar isn't just sweetness; it tenderizes, creates moisture, and helps with browning. Eggs bind everything together while adding richness and lift.
Fresh ingredients perform better, period. Test your baking powder by dropping a teaspoon into hot water, it should fizz vigorously. Baking soda should be replaced every six months, and vanilla extract beats imitation every time for depth of flavor.
Quick Answer: Top 5 Must-Have Baking Ingredients
- All-purpose flour (for structure and texture)
- Unsalted butter (for flavor control and fat content)
- Fresh eggs (for binding and leavening)
- Pure vanilla extract (for depth and complexity)
- Active baking powder (for reliable lift)
Baking Measurements Mastery: How to Measure Like a Pro
Baking is chemistry, and chemistry demands precision. For dry ingredients, use the scoop-and-level method: overfill your measuring cup, then level with a straight edge. Never pack flour unless the recipe specifically calls for it, you'll end up with dense, heavy results.
Wet ingredients require a different approach. Use liquid measuring cups with spouts, and check at eye level on a flat surface. For sticky ingredients like honey or molasses, spray your measuring cup with cooking oil first, everything slides out cleanly. For more on getting the most accurate results, see this guide to liquid measuring cups.
Prep Like a Chef: Timing, Temperature & Technique
Room temperature ingredients mix more easily and create better texture. Pull eggs and butter from the fridge 30-60 minutes before baking, or quick-warm eggs in a bowl of warm water for 5 minutes. Cold ingredients create lumpy batters that bake unevenly.
Preheat your oven for at least 20 minutes before baking, ovens lie about when they're ready. Sift dry ingredients when recipes call for it; this isn't fussy chef behavior, it's ensuring even distribution and preventing lumps that won't mix out later.
The DI ORO Approach: Essential Tools That Make Baking Easy (and Healthy)

Our Award-Winning Tools, And Why They Beat the Rest
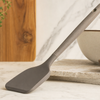
When America's Test Kitchen named our seamless silicone spatula the best all-purpose spatula, they weren't just testing performance, they were testing trust. Our pro-grade, forever-chemical-free silicone withstands 600°F without melting, warping, or leaching anything into your food.
The seamless design means no bacteria-harboring crevices, and the stainless steel core won't bend when you're scraping thick cookie dough or folding delicate meringue. Food Network's endorsement confirms what home bakers already know, these tools perform when it matters most.
| Feature | DI ORO Spatula | Standard Silicone | Wooden Spatula |
|---|---|---|---|
| Heat Resistance | 600°F | 400°F | Varies, can burn |
| Chemical Safety | Forever-chemical free | May contain PFOA/PFAS | Natural but porous |
| Cleaning | Seamless, dishwasher safe | Seams trap bacteria | Hand wash only |
| Durability | Stainless steel core | Flexible, may bend | Can crack or splinter |
Building Your Essential Baking Toolkit
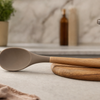
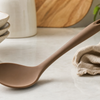
Beyond spatulas, your toolkit needs measuring cups (both dry and liquid), a digital scale for precision, and quality mixing bowls that won't slide around your counter. A bench scraper doubles as a dough cutter and pastry helper. A fine-mesh sieve elevates your flour game, while a sturdy whisk handles everything from delicate cream to thick cookie dough. These baking essentials tips start with having the right foundation, tools that won't quit when the heat is on. For more on choosing the right spatula for every job, see our article on spatulas.
Maintenance & Storage for Lasting Performance
Your tools are only as good as how you treat them. Silicone spatulas need immediate washing in warm, soapy water, no soaking required. For stubborn residue, a paste of baking soda and water works wonders without scratching. Store silicone tools in a drawer or crock, never crammed together where they can trap moisture.
Stainless steel tools benefit from thorough drying before storage to prevent water spots. Wooden utensils require monthly oiling with food-safe mineral oil to prevent cracking. Pro tip: rotate your tools regularly so wear stays even, your most-used spatula shouldn't be your only spatula.
Advanced Measurement & Mixing: How the Pros Make Every Batch Better
Mastering the Mix, Not Too Much, Not Too Little
The difference between tender muffins and hockey pucks lies in understanding your batter. Cake batters should be smooth but not overworked, mix until ingredients just disappear, about 30-45 seconds with an electric mixer. Cookie dough needs more structure, so cream butter and sugar for 3-4 minutes until light and fluffy before adding flour in two additions.
Bread dough tells its own story through the windowpane test: stretch a small piece until it's thin enough to see through without tearing. This indicates proper gluten development, typically achieved after 8-10 minutes of kneading. Each mixing method serves a purpose, folding preserves air bubbles in delicate batters, while vigorous whisking builds volume in egg whites.
Measurement Methods Compared: Cups vs. Scales vs. Spoons
| Method | Accuracy | Speed | Best For | Cleanup |
|---|---|---|---|---|
| Digital Scale | Highest (±1g) | Fastest | All baking, especially bread | Minimal |
| Measuring Cups | Good (±10%) | Moderate | Casual baking, liquids | Multiple pieces |
| Measuring Spoons | Variable | Slowest | Spices, extracts, leaveners | Moderate |
Professional bakers swear by weight measurements because 1 cup of flour can vary by 30% depending on how it's scooped. A scale eliminates guesswork and produces consistent results every time. However, measuring cups excel for liquids and remain perfectly adequate for most home baking projects when used correctly, level dry ingredients and use liquid measures at eye level.
Mixing Appliances: Stand Mixer vs. Hand Mixer vs. Manual Methods
Stand mixers dominate heavy-duty tasks like kneading bread dough and whipping large batches of cream, handling up to 14 cups of dough without strain. Their planetary mixing action ensures even incorporation, making them ideal for dense cookie doughs and thick cake batters. Hand mixers offer portability and precision for smaller jobs, perfect for whipping egg whites or creaming butter in modest quantities.
Manual methods aren't obsolete, they provide unmatched control for delicate operations. Folding chocolate chips into cookie dough by hand prevents overmixing, while whisking by hand lets you feel exactly when cream reaches soft peaks. Choose your tool based on batch size, desired precision, and the specific technique your recipe demands.
Baking Pans, Mats & Prep Surfaces: Choosing, Using, and Troubleshooting
Metal vs. Glass vs. Silicone, What Goes Where?
Metal pans conduct heat efficiently, creating crispy edges and golden bottoms, perfect for cookies, pizza, and anything requiring browning. Light-colored aluminum promotes even baking, while dark metal accelerates browning (reduce oven temperature by 25°F to compensate). Glass pans heat slowly but retain heat longer, making them ideal for casseroles and fruit crisps where gentle, sustained cooking improves texture.
Silicone molds offer unmatched release properties and flexibility, excelling with intricate shapes like bundt cakes and muffins. However, they don't conduct heat as effectively, so baked goods may need extra time or higher temperatures. For best results, place silicone molds on a metal baking sheet for stability and improved heat distribution. For more on the pros and cons of silicone in the kitchen, see this external resource on silicone bakeware.
Pan Prep That Prevents Disaster
Proper pan preparation starts 5 minutes before your batter is ready. Grease thoroughly with butter or neutral oil, paying special attention to corners and crevices. Dust with flour, cocoa powder for chocolate batters, or sugar for delicate cakes, tapping out excess. Parchment paper provides insurance, cut to fit exactly, leaving slight overhang for easy removal. For more tips on choosing the right bakeware, read our guide to the baking pan.
Temperature, Timing, and the Dynamics of Doneness

Perfect baking lives in the precision of heat and time. Your oven's dial might read 350°F, but reality often differs by 25-50 degrees. This variance transforms tender cookies into hockey pucks and fluffy cakes into dense disappointments.
Oven Truths: Why "350°F" Isn't Always 350°F
Most home ovens fluctuate wildly, cycling on and off to maintain approximate temperatures. An oven thermometer reveals the truth, place it center rack, preheat for 20 minutes, then check. Hot spots cluster near heating elements, while cool zones lurk in corners.
Combat uneven heating by rotating pans halfway through baking. Position racks in the center third of your oven for most recipes, moving to upper third only for browning tops. Dark pans absorb more heat than light ones, requiring temperature reductions of 25°F to prevent over-browning.
Doneness Demystified: Know When to Pull the Plug
Visual cues trump timers every time. Cakes spring back when gently pressed and pull slightly from pan edges. Cookies appear set but soft in centers, they'll firm as they cool. Bread sounds hollow when tapped on the bottom, with internal temperatures reaching 190-200°F.
Pro Testing Method: Insert a clean knife or toothpick into the center of cakes and quick breads. It should emerge with just a few moist crumbs clinging, completely clean means overbaked.
Muffins and cupcakes dome slightly and feel firm when touched. Brownies develop a shiny, crackled surface with edges that just begin pulling from the pan. Trust these signals over recipe times, which assume perfect ovens and exact ingredient temperatures.
Real-World Baking Scenarios: Solutions to Everyday Problems
Even experienced bakers face disasters. Sunken cakes, spreading cookies, and lumpy batters plague kitchens worldwide. Understanding why failures happen transforms frustration into learning opportunities.
When Good Bakes Go Bad: Troubleshooting 101
Cake collapse stems from several culprits: opening the oven door too early, overmixing batter, or incorrect leavening ratios. Cookies spread excessively when butter is too warm, dough lacks chilling, or baking sheets are hot from previous batches.
| Problem | Likely Cause | Prevention |
|---|---|---|
| Dense, heavy cake | Overmixed batter | Mix just until ingredients combine |
| Cookies spread thin | Warm dough/hot pans | Chill dough 30 minutes; cool pans between batches |
| Lumpy batter | Cold ingredients | Bring eggs, butter to room temperature first |
| Sunken center | Underbaked or oven door opened | Test doneness properly; avoid opening door early |
Lumpy batters often result from temperature mismatches, cold eggs added to room temperature butter create separation. Bring ingredients to similar temperatures before combining, or warm eggs quickly in a bowl of warm water for 5 minutes.
Storage & Make-Ahead Magic
Proper cooling prevents soggy bottoms and collapsed structures. Cool cakes completely on wire racks, usually 2-3 hours, before wrapping. Hot baked goods create steam when covered, leading to soggy textures and potential mold.
Cookie dough freezes beautifully for up to three months. Scoop portions onto parchment-lined trays, freeze solid, then transfer to bags. Bake directly from frozen, adding 1-2 extra minutes. Cake layers wrapped tightly in plastic keep fresh for two days at room temperature or freeze for up to three months.
Cleaning and Restoring Your Baking Tools Post-Bake
Sticky dough and burnt-on sugar challenge even quality tools. Soak stubborn residue in warm, soapy water before scrubbing. DI ORO's seamless silicone spatulas rinse clean effortlessly, no crevices trap bacteria or odors like traditional designs. For a look at the best options available, see our review of the top rated seamless spatulas for baking.
For persistent odors in silicone tools, create a paste with baking soda and water, let sit for 30 minutes, then rinse thoroughly. The non-porous surface of pro-grade silicone resists staining and odor absorption, maintaining hygiene standards that wooden tools simply cannot match. For more on the safety of silicone utensils, refer to this FDA resource on silicone utensils.
Level Up: Creative and Seasonal Baking Ideas for Aspiring Home Chefs
Mastering fundamentals opens doors to creative expression. Seasonal ingredients, personalized flavors, and presentation techniques transform basic recipes into memorable experiences that reflect your culinary personality.
Holiday & Special Occasion Baking
Holiday baking demands reliability and visual impact. Cookies travel well when properly stored, choose sturdy recipes like shortbread or biscotti for gifting. For showstopping cakes, use seasonal flavors such as spiced pumpkin in autumn or citrus in winter. Edible decorations, think candied orange peel, sugared cranberries, or piped royal icing, add festive flair without fuss.
For birthdays and celebrations, personalize classic recipes with unique extracts, colored glazes, or custom shapes using silicone molds. Remember, the right tools, like DI ORO's seamless spatulas and nonstick-safe bakeware, make even ambitious projects approachable and fun.
Frequently Asked Questions
What are the essential baking ingredients every home baker should have and why are they important?
Every home baker should stock all-purpose flour for structure, unsalted butter for flavor and fat content, fresh eggs for binding and leavening, pure vanilla extract for depth of flavor, and active baking powder for reliable lift. Each ingredient plays a crucial role in texture, taste, and the overall success of your baked goods.
How can I ensure precise measurements for both dry and wet ingredients to improve my baking results?
Use a digital kitchen scale for the most accurate measurements, especially with dry ingredients, and measure wet ingredients in clear, graduated liquid measuring cups at eye level. Level off dry ingredients with a straight edge and avoid packing them down to maintain consistency and avoid altering the recipe’s balance.
Why is it important to use room temperature ingredients, and how does it affect the texture and consistency of baked goods?
Room temperature ingredients blend more evenly, creating a smoother batter and better emulsification. This leads to improved texture, consistent rise, and a tender crumb, ensuring your baked goods come out light and perfectly balanced every time.
What are some reliable tools recommended for baking under pressure, and how do they contribute to better outcomes?
Reliable tools like DI ORO’s pro-grade silicone spatulas, precise measuring spoons, and sturdy mixing bowls help you work efficiently and confidently. These tools withstand high heat, resist sticking, and allow for thorough mixing and scraping, reducing frustration and ensuring consistent, professional results even when the clock is ticking.


Please upload banner from store admin blog pages