Chicken Broccoli Braid: Essential Guide for Home Chefs
What is a Chicken Broccoli Braid?
Picture this: you're hosting Sunday brunch, and you want something that looks like you spent hours in the kitchen but actually came together in about 30 minutes. Enter the chicken broccoli braid—a dish that's equal parts comfort food and showstopper.
This isn't just any ordinary weeknight dinner. The chicken broccoli braid transforms simple ingredients into something that'll have your guests asking for the recipe before they've finished their first slice. We're talking tender chunks of chicken, crisp-tender broccoli, and melty cheese all wrapped up in golden, flaky pastry that's braided to perfection.
The dish gained serious popularity thanks to Pampered Chef demonstrations, where the pampered chef chicken & broccoli braid became a signature recipe that home cooks couldn't stop talking about. But here's the thing—you don't need special equipment or years of pastry experience to nail this recipe. What you do need are the right tools and techniques to handle that delicate crescent dough without it turning into a sticky mess.
From Demo Kitchen to Family Favorite
The chicken broccoli braid earned its stripes in demonstration kitchens across America, where home cooks watched in amazement as simple ingredients transformed into something restaurant-worthy. The braided chicken recipe concept isn't new—braided breads and pastries have been around for centuries—but this particular combination of chicken, broccoli, and cheese wrapped in accessible crescent dough made it achievable for everyday cooks.
What makes this dish so appealing? It's the perfect marriage of comfort and sophistication. The filling delivers all the cozy flavors of a classic chicken and broccoli casserole, while the braided presentation elevates it to something special enough for guests. Plus, it's incredibly forgiving—if your braid isn't picture-perfect, it'll still taste amazing.
Why This Recipe Works for Real Kitchens
The chicken broccoli braid recipe hits that sweet spot every home chef is looking for: impressive results without intimidating techniques. Unlike traditional braided breads that require yeast, rising time, and kneading, this version uses refrigerated crescent dough as a shortcut that actually works better than homemade for most home cooks.
The filling is endlessly customizable—got leftover vegetables? Toss them in. Prefer a different cheese? Swap it out. Want to lighten things up? Use Greek yogurt instead of mayo. The base recipe is your canvas, and you're the artist.
If you're prepping ahead for a gathering, consider pairing your braid with a refreshing jerk chicken salad—the bold spices and fresh veggies offer a vibrant contrast to the creamy, cheesy filling of the braid, making for a well-rounded and satisfying meal.
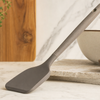
But here's where having the right tools makes all the difference. Working with crescent dough requires gentle handling and precise cutting, which is why having a quality knife and the right spatula for mixing becomes crucial. When you're folding those delicate strips of dough over the filling, you want tools that won't tear the pastry or leave you frustrated.
The best part? This recipe is practically designed for meal prep and entertaining. You can assemble the entire braid hours ahead, keep it covered in the fridge, and bake it fresh when you're ready. The result is always that perfect golden-brown exterior with a hot, bubbly filling inside that makes everyone think you're some kind of culinary genius.
Whether you're tackling this for a special occasion or just want to turn Tuesday night dinner into something memorable, the chicken broccoli braid delivers on both flavor and presentation. And with the right approach—which we're about to walk you through—you'll nail it on the first try.
Ingredients & Substitutions: Building Your Perfect Braid
 kitchen scene with broccoli, roasted chicken, herbs, eggshells, and flour on wooden table.">
The beauty of a chicken broccoli braid lies in its flexibility—you can work with what you have while still creating something spectacular. Let's break down the essentials and explore smart swaps that'll keep your braid game strong.
Key Takeaways
- A chicken broccoli braid is a savory, braided pastry filled with seasoned chicken, broccoli, and cheese wrapped in flaky crescent dough.
- This dish combines comfort food flavors with an elegant presentation, making it ideal for family dinners, brunches, and entertaining guests.
- The recipe is versatile and forgiving, allowing for substitutions like different cheeses or vegetables and using leftover or fresh chicken.
- Using refrigerated crescent dough simplifies the process, eliminating the need for yeast or kneading while still producing impressive results.
- The chicken broccoli braid can be assembled ahead of time and baked later, making it convenient for meal prep and entertaining.
Table of Contents
- What is a Chicken Broccoli Braid?
- Ingredients & Substitutions: Building Your Perfect Braid
- Essential Equipment and Setup
- Step-by-Step Preparation Method
- Baking Techniques and Troubleshooting
- Serving and Storage Strategies
- Advanced Variations and Make-Ahead Tips
- Mastering the Art of Braided Excellence
Core Ingredients Breakdown
Your chicken broccoli braid starts with a foundation of simple, quality ingredients. Cooked chicken forms the protein base—whether you're using leftover roast chicken, rotisserie convenience, or freshly cooked breast meat, aim for about 2 cups diced or shredded. The key is ensuring it's well-seasoned and not overcooked.
Fresh broccoli florets bring color, nutrition, and that satisfying crunch. Chop them into small, uniform pieces—roughly ¼-inch—so they distribute evenly and cook through without making your braid soggy. About 1½ cups should do the trick.
For the creamy binding element, mayonnaise is the classic choice, but don't feel locked in. Sharp cheddar cheese adds that tangy bite that makes each slice memorable, while refrigerated crescent roll dough provides the flaky, golden exterior that transforms simple ingredients into something bakery-worthy.
Pro Tip: Keep your crescent dough chilled until the moment you're ready to assemble. Cold dough is easier to work with and less likely to tear during the braiding process.
Smart Substitutions and Upgrades
Here's where your creativity can shine. If mayo isn't your thing, sour cream or Greek yogurt work beautifully—they add tang and creaminess while lightening the overall dish. For a richer flavor profile, try cream of mushroom soup as your binder; it adds depth and pairs beautifully with both chicken and broccoli.
Cheese-wise, sharp cheddar is classic, but Monterey Jack brings mild creaminess, while mozzarella creates those Instagram-worthy cheese pulls. For a gourmet twist, try a blend of Gruyère and Parmesan—it elevates the entire dish.
The dough deserves consideration too. While crescent rolls are convenient and reliable, puff pastry creates an even flakier, more elegant result. It's slightly more challenging to work with but delivers restaurant-quality results.
| Ingredient | Standard Option | Upgrade Option | Dietary Alternative |
|---|---|---|---|
| Binding Agent | Mayonnaise | Cream of mushroom soup | Greek yogurt |
| Cheese | Sharp cheddar | Gruyère blend | Dairy-free cheddar |
| Dough | Crescent rolls | Puff pastry | Gluten-free crescent |
| Protein | Rotisserie chicken | Herb-roasted chicken breast | Plant-based chicken |
essential-equipment-and-setup">Essential Equipment and Setup
You don't need a professional kitchen to nail this recipe, but having the right tools makes the process smoother and more enjoyable. Your most important ally? A reliable spatula that won't melt, bend, or scratch your non-stick surfaces.
A large mixing bowl handles your filling preparation, while a sharp knife or food chopper ensures uniform vegetable pieces. For the dough work, a pizza cutter or sharp knife creates clean braiding strips, and a pastry brush applies that gorgeous golden egg wash.
Your baking vessel matters too. A standard baking sheet works perfectly, but if you have a baking stone, it delivers superior heat distribution and a crisper bottom crust. Line either with parchment paper for easy cleanup and transfer.
Step-by-Step Preparation Method

Success starts with proper mise en place—having everything measured, chopped, and ready before you touch the dough. This isn't just chef fancy; it's practical wisdom that prevents your dough from warming up while you scramble to prep ingredients.
Preparing the Filling
In your mixing bowl, combine the cooked chicken, chopped broccoli, shredded cheese, and your chosen binding agent. Season generously with salt and pepper—remember, this filling needs to carry flavor throughout the entire braid. If you're adding optional ingredients like diced red bell pepper or minced garlic, fold them in now.
The mixture should hold together when stirred but not be overly wet. If it seems dry, add a bit more mayo or your chosen binder. Too wet? A handful of additional cheese helps absorb excess moisture.
Dough Preparation and Shaping
Unroll your crescent dough onto your prepared baking sheet, pressing seams together to create one cohesive rectangle. This is where a quality spatula becomes invaluable—use it to smooth and seal seams without tearing the delicate dough.
Now comes the signature technique: cutting the braiding strips. Using your pizza cutter or sharp knife, slice both long sides of the rectangle into 1-inch strips, leaving about 3 inches of solid dough down the center for your filling. The strips should be roughly equal in length and spacing—this ensures an even, professional-looking braid.
Spoon your prepared filling down the center strip, keeping it contained within the uncut area. Don't overfill; you need room for the dough strips to overlap and seal properly. Starting from one end, alternately fold strips over the filling, creating that classic braided appearance. Each strip should slightly overlap the previous one, and you'll want to gently press each strip to the dough beneath to ensure good adhesion.
Sealing and Finishing Touches
Once your braid is complete, take a moment to inspect the seams. Press the ends gently to seal, and tuck any loose edges underneath for a clean presentation. This is where attention to detail separates a good braid from a great one.
For that bakery-worthy golden finish, brush the entire surface with beaten egg white. This creates the gorgeous, glossy crust that makes your chicken broccoli braid look professionally made. If you're using slivered almonds, sprinkle them on now—they add a delightful crunch and visual appeal that elevates the entire dish.
Pro Tip: A light sprinkle of coarse sea salt over the egg wash adds a gourmet touch and enhances the overall flavor profile. Just a pinch—you want to complement, not overpower.
Baking Techniques and Troubleshooting
Preheat your oven to 375°F (190°C)—this temperature strikes the perfect balance between cooking the filling through and achieving that golden, flaky crust. Bake for 20-28 minutes, but start checking at the 18-minute mark. You're looking for a deep golden brown color and a crust that sounds hollow when gently tapped.
If your braid is browning too quickly, tent it loosely with foil during the final 5-10 minutes. This prevents over-browning while ensuring the interior reaches the proper temperature. The internal temperature should reach 165°F for food safety, but the visual cues are usually your best guide.
Common Challenges and Solutions
Even experienced home chefs encounter hiccups with braided recipes. If your filling leaks during baking, it's usually because the seams weren't pressed firmly enough or the filling was too wet. For next time, drain any excess liquid from your mixture and be more generous with the sealing pressure.
Soggy bottom syndrome happens when the oven isn't fully preheated or when there's too much moisture in the filling. A preheated baking stone eliminates this issue entirely, but if you're using a regular baking sheet, make sure it's in the lower third of your oven for better bottom heat.
If your dough tears during assembly, it's likely too warm. Pop it in the refrigerator for 10 minutes to firm up, then continue. Cold dough is your friend—it's easier to handle and holds its shape better during baking.
Serving and Storage Strategies

Let your braid rest for 5-10 minutes after baking—this allows the filling to set slightly, making for cleaner slices. Use a sharp serrated knife and a gentle sawing motion to cut through the flaky crust without crushing the delicate layers.
For dinner parties, slice into 1-inch thick portions for main course servings. For appetizers or brunch spreads, thinner ½-inch slices work beautifully. Each slice should showcase that gorgeous braided pattern and the colorful filling within.
Storage is straightforward: refrigerate leftovers in an airtight container for up to three days. Reheat individual slices in the microwave for quick meals, or warm the whole braid in a 350°F oven for 10-15 minutes to restore the crust's crispness.
Advanced Variations and Make-Ahead Tips
Once you've mastered the basic technique, the possibilities expand exponentially. Try a Mediterranean version with sun-dried tomatoes, olives, and feta cheese. Or go Mexican with seasoned chicken, black beans, corn, and pepper jack cheese. The braiding technique remains the same; only your flavor profile changes.
For meal prep enthusiasts, this recipe is a dream. Assemble the entire braid up to the baking step, wrap tightly in plastic wrap, and refrigerate for up to 24 hours. When ready to serve, brush with egg wash and bake as directed—you might need an extra 5 minutes since you're starting from cold.
You can even freeze assembled, unbaked braids for up to three months. Thaw overnight in the refrigerator before baking. This make-ahead capability makes chicken broccoli braid perfect for entertaining or busy weeknight dinners.
Mastering the Art of Braided Excellence
The chicken broccoli braid represents everything we love about home cooking—it's approachable yet impressive, customizable yet foolproof, and delivers that perfect balance of comfort and sophistication. Whether you're following the classic Pampered Chef-inspired version or creating your own signature variation, the key lies in understanding the fundamentals: quality ingredients, proper technique, and attention to detail.
Remember that cooking is about more than just following recipes—it's about creating experiences and memories. This braided chicken recipe has the power to transform an ordinary Tuesday dinner into something special, or serve as the centerpiece for your next gathering. With practice, you'll develop an intuitive feel for the dough, the filling ratios, and the timing that works best in your kitchen.
The beauty of mastering this technique extends far beyond a single recipe. Once you understand the principles of braided pastry, you can apply them to countless other combinations—breakfast braids with eggs and cheese, dessert versions with fruit and cream cheese, or seasonal variations that celebrate whatever's fresh in your garden or local market.
So roll up your sleeves, gather your ingredients, and embrace the creative process. Your kitchen is calling, and with the right tools and techniques, you're ready to answer with confidence. After all, the best meals aren't just about feeding people—they're about bringing them together, one delicious slice at a time.
For more information on food safety in the kitchen when handling chicken, be sure to follow best practices to keep your meal both delicious and safe.
And if you're interested in learning about food safety broccoli tips, check out this authoritative guide for preserving and preparing broccoli safely.
**


Please upload banner from store admin blog pages