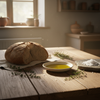
Date Bread Mastery: Quick Tricks From Pro Bakers
The secret to perfect date bread isn't just in the recipe—it's in mastering the techniques that transform simple ingredients into bakery-quality loaves with impossibly moist crumbs and rich, caramelized sweetness.
If you're chasing the nostalgic flavors of your grandmother's 1947 date nut bread or perfecting a modern moist date bread recipe, the difference between good and extraordinary lies in understanding how professional bakers approach this beloved quick bread.
Key Takeaways
- Perfect date bread requires mastering techniques beyond just following a recipe.
- Professional methods ensure a moist crumb and rich, caramelized sweetness in the bread.
- Understanding baker approaches bridges the gap between good and extraordinary date bread.
- Both traditional and modern date bread recipes benefit from these expert tips.
Table of Contents
- What Makes Date Bread Special
- Essential Ingredients for Date Bread Success
- Mastering the Mixing Technique
- Professional Baking Techniques for Date Bread
- Classic Date Bread Recipe Variations
- Troubleshooting Common Date Bread Problems
- Storage and Serving Mastery
- Date Bread in a Can Phenomenon
- Elevating Your Date Bread Game
- The Science of Perfect Date Bread
- Mastering the Art of Date Bread
Date bread has earned its place as one of America's most cherished comfort foods, and for good reason. Unlike other quick breads that rely heavily on added sugars, date bread gets its distinctive sweetness from the dates themselves, creating layers of complex flavor that develop beautifully during baking. The result? A tender, almost cake-like texture that's equally at home on your breakfast table or as an afternoon treat with coffee.
What Makes Date Bread Special
Think of date bread as the sophisticated cousin of banana bread—naturally sweet, incredibly moist, and forgiving enough for novice bakers while offering plenty of room for creative expression. The magic happens when dates break down during the mixing and baking process, releasing their natural sugars and creating pockets of concentrated sweetness throughout the loaf.
Professional bakers know that dates do more than just sweeten—they act as natural humectants, drawing moisture from the air and keeping your bread tender for days. This is why a well-made date bread recipe produces loaves that actually improve with time, developing deeper flavors as the ingredients meld together.
The cultural significance of date bread runs deep in American baking traditions. From the famous pioneer woman date nut bread that graced Depression-era tables to the iconic date bread in a can that became a grocery store staple, this humble quick bread has sustained families through both lean times and celebrations.
The Science Behind the Moisture
What sets exceptional date bread apart is understanding how dates interact with other ingredients. When you soak chopped dates in hot liquid—a technique every pro baker swears by—you're not just softening them. You're creating a natural syrup that distributes evenly throughout your batter, ensuring every bite delivers that characteristic sweetness.
The key is in the preparation. Medjool dates, with their naturally high moisture content and rich flavor, are the gold standard. But here's where technique matters: chopping them too large creates uneven distribution, while chopping too fine can make them disappear entirely into the batter.
Essential Ingredients for Date Bread Success

Professional bakers approach date bread ingredients with the precision of a chemist and the intuition of an artist. Each component serves a specific purpose, and understanding these roles is what separates amateur attempts from bakery-quality results.
Choosing the Right Dates
Not all dates are created equal when it comes to baking. Medjool dates reign supreme for their size, moisture content, and complex flavor profile that includes notes of caramel and honey. They're what you'll find in most moist date bread recipes from professional kitchens.
Deglet Noor dates work beautifully too, offering a slightly firmer texture and more subtle sweetness. The trick is ensuring they're fresh—dates that have dried out will create tough, chewy bits in your finished bread rather than the tender pockets of sweetness you're after.
Here's a pro tip that makes all the difference: always pit and chop your dates by hand rather than using a food processor. Hand-chopping gives you better control over size consistency, and it prevents the dates from turning into paste, which can make your batter dense.
The Flour Foundation
All-purpose flour is the backbone of most date bread recipes, providing the right balance of protein for structure without creating tough, chewy results. Professional bakers often sift their flour, not for appearance but to ensure even distribution and prevent pockets of dry flour that can create dense spots in the finished loaf.
The protein content in your flour matters more than you might think. Too high, and your date bread becomes dense and heavy. Too low, and it won't have enough structure to support the weight of the dates and nuts. Standard all-purpose flour hits that sweet spot perfectly.
Sweeteners and Flavor Enhancers
Brown sugar is the professional's choice over white sugar in date bread, and there's solid science behind this preference. The molasses in brown sugar complements the caramel notes in dates while adding moisture that keeps your bread tender longer. It also contributes to that beautiful golden-brown color that makes homemade date bread so appealing.
Many bakers underestimate the power of salt in sweet breads, but it's absolutely crucial. Salt doesn't just enhance sweetness—it strengthens gluten structure and helps balance the intense sweetness of dates. A pinch too little, and your bread tastes flat. A pinch too much, and you've overpowered the delicate date flavor.
Vanilla extract is non-negotiable in professional kitchens. It doesn't just add flavor—it rounds out the sweetness and adds depth that makes people wonder what your secret ingredient is. Always use pure vanilla extract rather than imitation; the difference is noticeable in the final product.
Mastering the Mixing Technique
This is where good date bread becomes great date bread. Professional bakers know that the mixing method can make or break your loaf, and it's where most home bakers go wrong without realizing it.
The creaming method—beating butter and sugar until light and fluffy—creates the tender crumb that distinguishes bakery-quality date bread. This process incorporates air into the batter, creating lift and lightness that balances the density of the dates. When your DI ORO spatula easily cuts through properly creamed butter and sugar, you know you're on the right track.
The Critical Folding Stage
Here's where technique becomes art. Once you add your flour mixture, every stroke matters. Overmixing develops gluten, creating tough, chewy bread instead of the tender crumb you want. Professional bakers use a gentle folding motion, turning the bowl as they work to ensure even distribution without overworking the batter.
Your DI ORO spatula becomes essential here—its flexible head and sturdy construction let you fold ingredients together with confidence, scraping the bowl clean without deflating the carefully incorporated air. The seamless design means no batter gets trapped in crevices, ensuring every bit of your carefully prepared ingredients makes it into the pan.
The batter should look slightly lumpy when you're done—smooth batter usually means overmixed batter. Trust the process, even when your instincts tell you to keep mixing.
Incorporating Dates and Nuts
This final addition requires a delicate touch. Dates and nuts should be folded in just until evenly distributed. Too much mixing at this stage breaks down the dates and crushes the nuts, affecting both texture and appearance in your finished loaf.
Professional bakers often toss chopped dates and nuts in a small amount of flour before folding them in. This coating helps prevent them from sinking to the bottom during baking, ensuring even distribution throughout the loaf.
Professional Baking Techniques for Date Bread

The difference between a good date bread and an exceptional one often comes down to temperature control and timing—two areas where professional bakers never compromise. Your oven temperature isn't just a suggestion; it's the foundation of proper texture development.
Most professional kitchens bake date bread at 325°F rather than the higher temperatures you might expect. This lower heat allows the interior to cook through completely while preventing the exterior from browning too quickly. The result? That perfectly moist date bread recipe outcome you're chasing, with an evenly golden crust and tender crumb throughout.
Here's a technique that separates the pros from the home bakers: the toothpick test isn't foolproof. Professional bakers look for visual cues—the bread should pull slightly away from the sides of the pan, and the center should spring back when lightly touched. A toothpick inserted in the center should come out with just a few moist crumbs clinging to it, not completely clean.
Pan Preparation Secrets
The way you prepare your loaf pan directly impacts both the texture and appearance of your finished date bread. Professional bakers never just grease their pans—they create a non-stick system that ensures clean release every time.
Start with butter or oil, then dust with flour, tapping out the excess. This creates a barrier that prevents sticking while contributing to that beautiful, evenly browned crust. Some bakers line their pans with parchment paper, leaving overhang for easy lifting, but this can sometimes create softer sides that lack the appealing texture contrast of a properly prepared pan.
Your DI ORO spatula becomes invaluable for spreading batter evenly in the pan. Its flexible edge reaches every corner, ensuring uniform thickness that translates to even baking. No more dense ends and undercooked centers—just consistent results every time.
The Cooling Process
Patience during cooling separates amateur bakers from professionals. That gorgeous date bread needs to cool in the pan for exactly 10-15 minutes—no more, no less. Too short, and it falls apart when you try to remove it. Too long, and steam creates soggy bottoms that ruin the texture you've worked so hard to achieve.
After the initial cooling period, turn the bread out onto a wire rack to finish cooling completely. This allows air circulation around the entire loaf, preventing condensation that can make the crust soft and unappealing. Professional bakers know that cutting into warm bread, no matter how tempting, releases moisture that should stay trapped inside for optimal texture.
Classic Date Bread Recipe Variations
Understanding the foundation allows you to explore variations with confidence. The pioneer woman date nut bread that became an American standard follows specific principles—many of which also apply to other rich quick breads like walnut bread—that you can adapt to create your own signature version.
The classic 1947 date nut bread recipe that many families treasure represents Depression-era ingenuity—maximum flavor from minimal ingredients. These recipes typically use a higher ratio of dates to flour, creating incredibly moist loaves that kept well without refrigeration. Modern adaptations often add Greek yogurt or sour cream for extra tenderness, but the core technique remains unchanged.
For readers interested in exploring more historical and innovative approaches, check out this comprehensive guide to date nut bread’s history and recipes.
Nut-Free Variations
Creating exceptional date bread without nuts requires understanding how nuts contribute to the overall texture and flavor profile. Nuts provide textural contrast and richness that you'll need to replace thoughtfully.
Professional bakers often increase the vanilla extract slightly and add a touch of almond extract to compensate for the missing nutty flavors. Some add a tablespoon of wheat germ or rolled oats for textural interest, while others incorporate seeds like sunflower or pumpkin for crunch without the allergen concerns.
The key is maintaining the moisture balance. Nuts contribute some fat to the recipe, so nut-free versions might need an extra tablespoon of butter or oil to achieve the same tender crumb.
Spiced Date Bread Mastery
Spices transform basic date bread into something extraordinary, but the key is restraint and balance. Professional bakers treat spices like seasoning—enhancing rather than overwhelming the natural date flavor.
Cinnamon is the obvious choice, but it should complement, not dominate. A teaspoon in a standard loaf provides warmth without masking the dates' complexity. Nutmeg adds sophistication—just a quarter teaspoon creates depth that people notice but can't quite identify. Allspice brings subtle complexity that bridges the gap between sweet and savory.
Orange zest is a professional secret that elevates any date bread recipe. The oils in fresh zest brighten the rich sweetness of dates while adding aromatic complexity that makes your kitchen smell like a high-end bakery. Always use fresh zest, never dried—the difference is dramatic. If you want to achieve the perfect zest and grated textures for your baking, consider using a DI ORO zester & grater for optimal results.
Troubleshooting Common Date Bread Problems

Even experienced bakers encounter challenges with date bread, but understanding the science behind common problems helps you prevent them before they occur.
Dense, heavy bread usually results from overmixing or using dates that weren't properly prepared. If your dates were too dry or chopped too large, they absorb moisture from the batter without contributing their own, creating pockets of density. The solution is always in the preparation—properly soaked, evenly chopped dates distribute their moisture throughout the batter.
Preventing Sunken Centers
A sunken center in date bread typically indicates temperature issues—either your oven runs hot, causing rapid rising followed by collapse, or the batter was overmixed, creating weak structure that can't support itself.
Professional bakers prevent this by using an oven thermometer to verify actual temperatures and by understanding their specific oven's hot spots. Rotating the pan halfway through baking ensures even heat distribution, while proper mixing technique creates the structure needed for a perfectly domed top.
Your DI ORO spatula's heat resistance becomes crucial here—you can confidently check doneness and make adjustments without worrying about melted plastic contaminating your carefully crafted bread.
Achieving Perfect Moisture Balance
The holy grail of date bread is achieving that perfect moisture balance—tender and moist without being gummy or dense. This comes down to understanding how different ingredients contribute moisture and how baking time affects the final texture.
Professional bakers know that slightly underbaking produces better results than overbaking. Date bread continues cooking from residual heat even after removal from the oven, so that slightly underdone center becomes perfectly moist as it cools.
Storage technique affects moisture too. Wrapping cooled bread tightly in plastic wrap traps just enough moisture to keep it tender without creating sogginess. Many professional bakers wrap their date bread and let it rest overnight before slicing—this resting period allows moisture to redistribute evenly throughout the loaf.
Mastering these professional techniques transforms date bread from a simple quick bread into a bakery-quality creation that showcases your skills and attention to detail. The combination of proper ingredient preparation, precise mixing technique, and understanding the science behind the baking process ensures consistent, exceptional results every time.
Storage and Serving Mastery
Professional bakers understand that proper storage isn't just about preservation—it's about enhancing flavor and texture over time. Your freshly baked date bread actually improves with proper storage, developing deeper flavors and more cohesive texture as it rests.
The key is creating the right environment. Wrap your completely cooled date bread tightly in plastic wrap, then place it in an airtight container. This double-barrier system prevents moisture loss while avoiding the condensation that can make crusts soggy. Many professionals swear by letting wrapped date bread rest for 24 hours before the first slice—this resting period allows the moisture from the dates to redistribute evenly throughout the crumb.
For longer storage, your date bread recipe creations freeze beautifully for up to three months. Slice before freezing, placing parchment paper between slices, so you can remove individual portions without thawing the entire loaf. Frozen slices toast directly from the freezer, making them perfect for quick breakfasts or unexpected guests.
Professional Serving Techniques
The way you slice and serve date bread affects both presentation and eating experience. Professional bakers use a sharp serrated knife in a gentle sawing motion, never pressing down, which can compress the delicate crumb structure you've worked so hard to achieve.
Room temperature date bread slices cleanly and showcases its texture beautifully. However, day-old bread benefits from light toasting, which revives the crust and intensifies the date flavors. A light brush of butter before toasting creates an irresistible golden exterior that contrasts beautifully with the tender interior.
Your DI ORO spatula becomes useful here too—its thin, flexible edge makes it perfect for spreading softened butter or cream cheese evenly across delicate slices without tearing the crumb. If you're looking to upgrade your essential kitchen utensils for baking and serving, explore our carefully curated recommendations.
Date Bread in a Can Phenomenon

The concept of date bread in a can might seem unusual, but it represents an interesting chapter in American baking history. During the mid-20th century, canned date breads became popular as shelf-stable gifts and emergency pantry items, particularly in New England.
These commercial versions taught home bakers valuable lessons about moisture retention and flavor concentration. The canning process essentially steamed the bread, creating incredibly moist textures that many tried to replicate in home kitchens. Understanding this technique helps explain why some traditional recipes call for longer, lower-temperature baking—they're mimicking that steaming effect.
Modern home bakers can achieve similar results by placing a pan of hot water on the oven's bottom rack during the first half of baking. This creates steam that keeps the exterior from setting too quickly while the interior cooks through, resulting in remarkably tender, moist date bread that rivals those vintage canned versions. For more on traditional and innovative quick bread techniques, visit this expert breakdown of date nut and strawberry quick breads.
Adapting Vintage Techniques
The pioneer woman date nut bread and 1947 date nut bread recipes that families treasure often include techniques that seem outdated but actually represent sophisticated baking science. These recipes frequently call for dissolving baking soda directly in hot water with the dates—a technique that activates the leavening while simultaneously softening the fruit.
This method creates a chemical reaction that slightly breaks down the dates' cell walls, releasing more natural sugars and creating better integration with the batter. Modern bakers who skip this step often wonder why their date bread lacks the deep, complex sweetness of grandma's version.
Another vintage technique worth adopting is the "ribbon test" for batter consistency. Properly mixed date bread batter should fall from your spatula in a thick ribbon that briefly holds its shape before disappearing into the mixture. This indicates optimal hydration and gluten development without overmixing.
Elevating Your Date Bread Game
Once you've mastered the fundamentals, professional techniques can transform your moist date bread recipe into something truly exceptional. Consider the French technique of "blooming" your spices—briefly heating cinnamon, nutmeg, or allspice in a dry pan before adding them to your batter. This releases volatile oils that create more complex, aromatic flavors.
Temperature contrast is another professional secret. Some bakers chill their prepared batter for 30 minutes before baking, which slows the initial rise and creates a more tender crumb structure. Others add a handful of chopped dates that have been tossed in flour—these flour-coated pieces won't sink during baking and create delightful pockets of concentrated sweetness throughout the loaf.
The most advanced technique involves creating a date paste by pureeing some of your soaked dates and incorporating this along with the chopped pieces. This creates layers of date flavor—the paste provides deep, caramelized notes while the chunks offer textural interest and bright, fresh date taste. For more inspiration on adapting heritage recipes to contemporary tastes, this California-inspired guide to the best date bread is a great resource.
Seasonal Adaptations
Professional bakers understand that great date bread adapts to the seasons while maintaining its essential character. Fall versions might include a touch of maple syrup and toasted walnuts, while winter adaptations could feature warming spices like cardamom or ginger.
Spring date bread benefits from the addition of fresh orange zest and a hint of vanilla bean paste, creating brightness that complements the rich dates. Summer versions can incorporate a small amount of Greek yogurt for tang and extra moisture that stands up to warm weather.
Each adaptation requires slight adjustments to liquid ratios and baking times, but the fundamental techniques remain constant. Understanding these principles allows you to create signature variations that reflect your personal style while honoring the classic date bread tradition. If you're looking to expand your baking toolkit for such creative ventures, explore our Seamless Series kitchen utensils—designed for both precision and versatility.
The Science of Perfect Date Bread
Understanding the science behind date bread creation elevates your baking from following recipes to crafting experiences. Dates contain natural enzymes that continue working during the baking process, breaking down starches into sugars and creating that characteristic deep sweetness that develops over time.
This enzymatic activity is why properly made date bread often tastes better the day after baking—those enzymes need time to work their magic. It's also why the soaking step is so crucial; hot water activates these enzymes while softening the fruit's structure for better integration.
The Maillard reaction—the browning that occurs between amino acids and sugars—plays a crucial role in developing date bread's complex flavors. The natural sugars in dates participate in this reaction throughout the baking process, creating hundreds of flavor compounds that give exceptional date bread its distinctive taste profile.
Your choice of fat affects this process too. Butter contributes to Maillard browning and adds its own complex flavors, while neutral oils create more tender textures but less flavor development. Understanding these interactions helps you make informed decisions about ingredient substitutions and modifications.
Mastering the Art of Date Bread
True date bread mastery comes from understanding that every element—from ingredient selection to final storage—contributes to the overall experience. The techniques shared by professional bakers aren't just about following steps; they're about understanding why each step matters and how small adjustments can create dramatically different results.
Whether you're recreating that beloved pioneer woman date nut bread or developing your own signature moist date bread recipe, success lies in respecting the process while embracing experimentation. Each loaf teaches you something new about timing, texture, and flavor development, building your intuition for what makes truly exceptional date bread. With proper tools—like your reliable DI ORO spatula that won't let you down at crucial moments—and these professional insights, you're equipped to create date bread that rivals any bakery and becomes a treasured part of your culinary repertoire. For more kitchen tips, discover our guide to assembling the ideal kitchen utensil set or browse all kitchen essentials for your baking adventures.
Frequently Asked Questions
How to make date loaf?
Making a date loaf starts with soaking chopped dates in hot water to soften them, which helps create a moist texture. Then, combine the soaked dates with flour, baking soda, eggs, and your choice of spices like cinnamon or nutmeg. Mix everything gently, pour into a loaf pan, and bake until a toothpick comes out clean. The result is a sweet, tender bread perfect for breakfast or a snack.
Can I eat out of date bread?
Whether you can eat out of date bread depends on how far past the date it is and how it looks or smells. If it’s only a few days past and shows no signs of mold or off odors, it’s usually safe to eat, though texture and flavor might have declined. Always use your senses and when in doubt, it’s better to play it safe and discard the bread.
What is bread date?
A bread date typically refers to the 'best by' or expiration date printed on the packaging, indicating when the bread is at its peak freshness. It helps consumers know how long the bread will maintain its best quality. After this date, bread may become stale or develop mold, so it’s a useful guideline to avoid wasting food or risking safety.
Are dates good for baking?
Yes, dates are fantastic for baking! They add natural sweetness, moisture, and a rich caramel-like flavor to baked goods. Dates also provide fiber and nutrients, making them a healthier alternative to refined sugars. Plus, their sticky texture helps bind ingredients together, enhancing the overall crumb.
Can I use dates instead of sugar in baking?
Absolutely! Dates can be used as a natural sweetener in place of sugar by blending them into a paste or finely chopping them. This swap not only sweetens your baked goods but also adds moisture and nutrients, creating a wholesome treat. Just keep in mind that dates bring a distinct flavor and texture, so it’s great for recipes where that caramel richness shines.
