Master These 7 Braising Recipes For Perfect Comfort Food
The Art of the Braise: Your Ticket to Winter Culinary Stardom
Let's talk about that moment when your kitchen fills with an aroma so rich and comforting that your neighbors might "accidentally" drop by. That, my fellow cooking enthusiasts, is the magic of braising—the cooking technique that transforms humble ingredients into mouthwatering masterpieces that make you look like a culinary genius (even if you're still figuring out how to boil water correctly).
At DI ORO, we believe the best cooking techniques should be accessible to everyone, not just those with fancy culinary degrees hanging on their walls. Braising recipes are the ultimate democratic cooking method—they're forgiving, flexible, and frankly, hard to mess up if you follow a few simple principles. Plus, they're the perfect excuse to break out that gorgeous Dutch oven that's been sitting pretty on your stovetop.
Whether you're wielding our award-winning silicone spatulas (yes, the ones America's Test Kitchen can't stop raving about) or our forever-chemical-free kitchen tools, I'm about to walk you through the braising basics that will have you cooking with the confidence of someone who's been doing this for decades. No culinary school required—just a sense of adventure and the right tools in your kitchen arsenal.
What Exactly Is Braising? (And Why It's Your New Secret Weapon)

Braising is culinary alchemy at its finest—a two-step cooking process that transforms tough cuts of meat into tender, flavor-packed dishes that taste like they took all day to make (because, well, they kind of did). But don't worry—most of that time is hands-off, leaving you free to binge-watch your favorite show or tackle that stack of books on your nightstand.
The braising process starts with searing your protein at high heat to develop a gorgeous brown crust (hello, flavor town!), then slowly simmering it in a small amount of liquid in a covered pot until it's fall-apart tender. The magic happens during this low-and-slow cooking phase, where collagen-rich cuts break down into gelatin, creating that melt-in-your-mouth texture we all dream about.
Think of braising as cooking's greatest redemption story—taking overlooked, economical cuts of meat and turning them into the stars of your dinner table. It's the cooking equivalent of the ugly duckling transformation, and it's about to become your signature move.
Why Braising Recipes Deserve a Spot in Your Winter Rotation
When the temperature drops and comfort food cravings hit, braising recipes answer the call with impressive reliability. These dishes aren't just delicious—they're practical kitchen workhorses that deliver multiple benefits:
- They transform inexpensive cuts into luxurious meals (your wallet says thank you)
- The hands-off cooking time frees you up for other activities (or that well-deserved glass of wine)
- Most braising recipes taste even better the next day (meal prep champions, rejoice!)
- The technique creates built-in sauces that are practically drinkable (though we recommend using a spoon)
- Your house will smell amazing for hours (no scented candle can compete)
Plus, there's something deeply satisfying about mastering a cooking technique that sounds fancy but is actually surprisingly straightforward. Next dinner party conversation starter? Check.
The Essential Braising Equipment (Hint: You Probably Already Have It)
Before we dive into specific braising recipes, let's talk tools. The beauty of braising is that it doesn't require a kitchen full of specialized gadgets—just a few quality essentials that pull their weight.
The Vessel: Dutch Oven Devotion
The star player in any braising operation is undoubtedly the Dutch oven—that heavy, enameled cast iron pot that's probably already earned prime real estate in your kitchen. Le Creuset may be the name that comes to mind for braising recipes (and yes, they're gorgeous), but any heavy pot with a tight-fitting lid will do the job admirably. The key features you're looking for:
- Heavy bottom for even heat distribution and superior searing
- Tight-fitting lid to trap moisture and create a mini flavor ecosystem
- Oven-safe construction for that crucial stovetop-to-oven transition
- Enough capacity to hold your protein without overcrowding (breathing room matters!)
No Dutch oven? No problem. A deep, heavy-bottomed stainless steel pot with a lid can pinch-hit effectively. Just make sure it's oven-safe if your braising recipes call for finishing in the oven.
The Supporting Cast: Tools That Make Braising a Breeze
While your Dutch oven does the heavy lifting, these kitchen sidekicks make the braising process smoother:
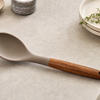
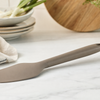
- Silicone Spatula: DI ORO's award-winning Seamless Series spatula is perfect for scraping up those flavor-packed browned bits when deglazing. Heat-resistant to 600°F and forever-chemical free, it's the tool you'll reach for again and again. (America's Test Kitchen named it the Best All-Purpose Spatula for good reason!)
- Tongs: Essential for flipping and transferring meat without piercing it and losing precious juices.
- Meat Thermometer: While braising is forgiving, knowing your meat's internal temperature helps achieve that perfect tenderness.
Remember, the best tools are the ones that make cooking more enjoyable—and with DI ORO's pro-grade, forever-chemical-free silicone tools, you can focus on the creative parts of cooking without worrying about what might be leaching into your food.
The Braising Formula: Your Roadmap to Flavor Town

One of the most beautiful aspects of braising recipes is that once you understand the basic formula, you can improvise with confidence. Think of it as a culinary template that works across cuisines and ingredients:
Step 1: The Sear (AKA Creating Your Flavor Foundation)
This step is non-negotiable, friends. Searing your protein creates the Maillard reaction—that beautiful browning that develops complex flavors no amount of herbs or spices can replicate. Pat your meat dry (moisture is the enemy of a good sear), season generously with salt and pepper, then sear in a hot pan with a high smoke-point oil until deeply browned on all sides.
Pro tip: Resist the urge to constantly flip! Give each side time to develop that gorgeous crust. Your patience will be rewarded with flavor that makes people close their eyes and say "mmm" involuntarily.
Step 2: The Aromatics (Building Your Flavor Profile)
Once your protein is seared and set aside, it's time to add the aromatics to the same pot (yes, we're keeping all those browned bits—that's where the magic lives). Typically, this includes:
- Onions, shallots, or leeks as your aromatic base
- Garlic (because, well, it's garlic)
- Carrots and celery for sweetness and depth
- Herbs like thyme, rosemary, or bay leaves
Cook these until softened and fragrant, using your DI ORO spatula to scrape up those flavor-packed browned bits from the bottom of the pan. This step builds the aromatic foundation that will infuse your braising liquid with complexity.
Step 3: The Deglaze (Unlocking Flavor Gold)
Now for one of the most satisfying cooking moments—deglazing. Add your liquid of choice (wine, broth, beer, or a combination) to the hot pan and watch as it sizzles and releases all those caramelized bits stuck to the bottom. This isn't just theatrics; it's capturing concentrated flavor that would otherwise be lost to the dishwasher.
For beef braising recipes, a robust red wine creates depth and richness. For lighter proteins like chicken, white wine or chicken broth keeps things balanced. The liquid should come about one-third to halfway up the sides of your meat—not submerge it completely (that's stewing, a close but distinct cousin to braising).
Step 4: The Simmer (Where Patience Pays Off)
Return your protein to the pot, bring to a gentle simmer, then cover and transfer to a low oven (typically 275-325°F) or maintain a bare simmer on the stovetop. Now comes the waiting game—typically 2-4 hours, depending on your protein.
The beauty here? You can't really overcook most braising recipes. The longer they go (within reason), the more tender they become. When done, your meat should yield easily to a fork or gentle tug.
In our next installment, we'll dive into specific braising recipes that showcase this technique at its finest—from classic beef short ribs that will make you weak in the knees to chicken thighs that will revolutionize your weeknight dinner game. We'll also explore how to adapt these principles for vegetarian braising that's every bit as satisfying as its meaty counterparts.
So preheat that oven, grab your Dutch oven, and prepare to embrace the season of slow cooking. With these braising fundamentals in your culinary toolkit, you're already halfway to dishes that taste like they came from a restaurant kitchen—but were made in yours, with love and maybe just a touch of showing off.
7 Essential Braising Recipes That Deliver Perfect Comfort Food Every Time
Now that we've covered the fundamentals of braising, it's time to roll up our sleeves and dive into some specific recipes that showcase this magnificent cooking technique. Think of these braising recipes as your culinary security blanket—reliable, comforting, and guaranteed to impress even the most discerning dinner guests (including that one friend who suddenly mentions they went to culinary school... every time you cook).
With your DI ORO spatula in hand—you know, the one that America's Test Kitchen couldn't stop raving about—you're ready to transform humble ingredients into dishes that taste like they've been simmering in a Michelin-starred kitchen. Let's get braising!
Classic Red Wine Braised Short Ribs: The Crown Jewel of Braising Recipes

If braising had a poster child, it would be beef short ribs. These collagen-rich cuts were practically designed for low, slow cooking, transforming from tough to transcendent after a few hours in your Dutch oven. This recipe isn't just dinner—it's an experience.
What You'll Need:
- 4 pounds bone-in beef short ribs
- 2 tablespoons vegetable oil
- 2 large onions, diced
- 3 carrots, chopped
- 2 celery stalks, chopped
- 4 garlic cloves, minced
- 2 tablespoons tomato paste
- 1 bottle dry red wine (Cabernet works beautifully)
- 2 cups beef stock
- Fresh thyme, rosemary, and bay leaves
- Salt and freshly ground black pepper
The Magic Method:
- Season those beautiful ribs generously with salt and pepper. Don't be shy—this is where the flavor foundation begins.
- Heat oil in your Dutch oven until it's shimmering hot. Sear the ribs on all sides until they're deeply browned (about 2 minutes per side). Work in batches to avoid overcrowding—these ribs deserve their space!
- Transfer the ribs to a plate and pour off all but about 2 tablespoons of fat. Add your aromatic trio (onions, carrots, celery) and cook until softened, about 5 minutes.
- Add garlic and tomato paste, cooking until fragrant and slightly darkened (about 2 minutes). This is where your DI ORO spatula shines, scraping up those flavor-packed bits from the bottom of the pan.
- Pour in that entire bottle of wine (saving a glass for the chef is optional but recommended) and bring to a simmer. Let it reduce by about a third.
- Return the ribs to the pot, add stock and herbs, and bring to a gentle simmer.
- Cover and transfer to a 325°F oven for about 2.5-3 hours, until the meat is fork-tender and practically falling off the bone.
Serve these magnificent ribs over creamy polenta or mashed potatoes, spooning that rich, glossy sauce generously over the top. The first bite will make you close your eyes and wonder why you ever order this dish at restaurants when you can create this magic at home. For even more delicious meal inspiration, check out our Best Sellers collection and discover our most-loved kitchen tools for perfect braising results every time.
Coq au Vin: The French Braising Classic That Never Disappoints
This iconic French dish proves that braising recipes aren't just for beef. Chicken thighs become tender, wine-infused morsels of joy in this rustic yet elegant preparation that's easier than its fancy name suggests.
What You'll Need:
- 8 bone-in, skin-on chicken thighs
- 4 ounces bacon, diced
- 1 large onion, diced
- 2 carrots, chopped
- 8 ounces mushrooms, quartered
- 4 garlic cloves, minced
- 2 tablespoons flour
- 1 bottle dry red wine (traditionally Burgundy)
- 1 cup chicken stock
- Fresh thyme and bay leaves
- 8 ounces pearl onions, peeled (frozen work fine!)
- Fresh parsley for garnish
The French Connection Method:
- Crisp the bacon in your Dutch oven, then set aside, leaving the rendered fat behind.
- Season chicken generously with salt and pepper, then sear skin-side down until golden brown (about 5 minutes), then flip and brown the other side briefly. Work in batches, then set chicken aside.
- Add onions, carrots, and mushrooms to the pot, cooking until softened and beginning to brown (about 8 minutes).
- Add garlic, cook for 1 minute, then sprinkle in flour and cook, stirring constantly with your trusty DI ORO spatula, for 2 minutes.
- Slowly add wine and stock, stirring to prevent lumps, then add herbs and bring to a simmer.
- Return chicken and bacon to the pot, add pearl onions, cover and transfer to a 325°F oven for about 1 hour, until chicken is tender but still holds its shape.
The result is chicken that's infused with wine-soaked goodness, surrounded by a sauce so rich you'll want to sop up every last drop with crusty bread. This is the kind of braising recipe that makes ordinary weeknight dinners feel like special occasions.
Osso Buco: The Italian Braising Masterpiece

This Milanese specialty featuring cross-cut veal shanks might sound intimidating, but it's actually one of the most straightforward braising recipes in your arsenal. The signature feature? That prized marrow in the center of the bone that gives this dish its name ("bone with a hole").
What You'll Need:
- 4 veal shanks, about 2 inches thick
- 2 tablespoons olive oil
- 1 onion, finely diced
- 1 carrot, finely diced
- 1 celery stalk, finely diced
- 4 garlic cloves, minced
- 1 cup dry white wine
- 1 can (14 oz) diced tomatoes
- 2 cups chicken or veal stock
- Strip of lemon zest
- Fresh thyme and bay leaves
- For gremolata: minced parsley, lemon zest, and garlic
The Italian Method:
- Tie kitchen twine around each shank to help them hold their shape during cooking (a step worth taking, trust me).
- Season shanks generously with salt and pepper, then dredge lightly in flour, shaking off excess.
- Heat oil in your Dutch oven and sear shanks until deeply browned on both sides (about 3 minutes per side). Set aside.
- Add the holy trinity of Italian cooking (onion, carrot, celery) to the pot and cook until softened.
- Add garlic, cook until fragrant, then pour in wine to deglaze, scraping up those flavor nuggets with your DI ORO spatula.
- Add tomatoes, stock, lemon zest, and herbs. Return shanks to the pot, ensuring they're partially submerged.
- Cover and transfer to a 325°F oven for 2-2.5 hours, until the meat is tender enough to cut with a spoon.
Traditionally served over saffron risotto or polenta, this dish is elevated by a sprinkle of gremolata—a bright, fresh mixture of parsley, lemon zest, and garlic that cuts through the richness perfectly. Don't forget to provide small spoons for scooping out that prized marrow! Want to up your kitchen game? Browse our Chef Series tools, designed for serious home cooks and professionals alike.
Moroccan Lamb Tagine: Braising with Exotic Flair
Braising recipes travel well across cultures, and this North African classic proves it. Combining tender lamb with sweet and savory elements, this tagine delivers complex flavors that seem to deepen with every bite. For a full Moroccan-inspired meal, you might want to try pairing this with a fresh vegetable side, such as roasted asparagus, which complements the warm spices beautifully.
What You'll Need:
- 2 pounds lamb shoulder, cut into 1.5-inch cubes
- 2 tablespoons olive oil
- 2 onions, sliced
- 4 garlic cloves, minced
- 2 tablespoons ginger, minced
- 1 cinnamon stick
- 1 teaspoon cumin
- 1 teaspoon coriander
- 1/2 teaspoon turmeric
- Pinch of saffron threads (optional but wonderful)
- 1 can (14 oz) diced tomatoes
- 2 cups chicken stock
- 1/2 cup dried apricots, chopped
- 1/4 cup green olives
- Fresh cilantro and mint for garnish
The Exotic Method:
- Season lamb generously with salt and pepper. Heat oil in your Dutch oven and sear lamb in batches until browned on all sides.
- Add onions to the pot and cook until softened and beginning to caramelize (about 8 minutes).
- Add garlic, ginger, and spices, cooking until fragrant (about 1 minute).
- Pour in tomatoes and stock, scraping up browned bits with your DI ORO spatula.
- Return lamb to the pot, bring to a simmer, cover and transfer to a 325°F oven for 2 hours.
- Add apricots and olives, then continue cooking for 30 minutes more.
Serve this aromatic masterpiece over fluffy couscous, garnished with fresh herbs and a sprinkle of toasted almonds if you're feeling fancy. The combination of tender lamb, sweet fruit, and savory olives creates a flavor profile that's both exotic and comforting. For another way to enhance the flavor of your tagine, consider adding a spoonful of dill seasoning or even a side of sour cream and onion dip for a fusion feast. For more expert advice, see this comprehensive guide to braising and Jordon King's foundations of braising—both offer great tips and inspiration for home cooks.
Vegetarian Mushroom Bourguignon: Proving Braising Isn't Just for Meat Lovers

Vegetarians deserve braising magic too! This plant-based take on the French classic delivers deep, satisfying flavors that will please even dedicated carnivores. The key? Treating mushrooms with the same respect you'd give beef. And for the best results, use precise tools like stainless steel measuring cups to measure your ingredients, ensuring consistent flavor and texture.
What You'll Need:
- 2 pounds mixed mushrooms (portobello, cremini, shiitake), cut into chunks
- 3 tablespoons olive oil, divided
- 1 large onion, diced
- 2 carrots, diced
- 2 celery stalks, diced
- 4 garlic cloves, minced
- 1 tablespoon tomato paste
- 2 cups red wine
- 2 cups vegetable stock
- 1 tablespoon soy sauce (umami boost!)
- Fresh thyme and bay leaves
- 8 ounces pearl onions, peeled
The Plant-Based Method:
- Heat 2 tablespoons oil in your Dutch oven over high heat. Add mushrooms in batches (don't crowd them!) and sear until they release their moisture and begin to brown (about 5 minutes per batch). Set aside.
- Add remaining oil and cook onions, carrots, and celery until softened (about 7 minutes).
- Add garlic and tomato paste, cooking until fragrant and slightly darkened.
- Pour in wine, scraping up any browned bits with your forever-chemical-free DI ORO spatula.
- Add stock, soy sauce, herbs, and pearl onions. Return mushrooms to the pot.
- Simmer, partially covered, for about 45 minutes, until the sauce has thickened and vegetables are tender.
Serve over creamy polenta or mashed potatoes for a meal so satisfying you'll forget there's no meat involved. The mushrooms absorb the wine and aromatics, creating deep, complex flavors that rival their beefy inspiration. For a fresh twist, try pairing this dish with a vegetable dip for a party-worthy vegetarian spread. Ready to upgrade your kitchen lineup? Explore our Limited Time Offers to save on must-have utensils and tools for every home chef.
Korean-Inspired Braised Short Ribs (Galbi Jjim): A Global Braising Adventure
Braising recipes cross cultural boundaries beautifully, as demonstrated by this Korean-inspired dish that balances sweet, savory, and umami flavors in perfect harmony. For an unforgettable meal, consider serving your short ribs alongside a steak sandwich or as part of a bigger spread with other comfort food favorites.
What You'll Need:
- 4 pounds bone-in beef short ribs
- 1/2 cup soy sauce
- 1/4 cup brown sugar
- 1/4 cup rice wine or mirin
- 2 tablespoons sesame oil
- 6 garlic cloves, minced
- 2 tablespoons ginger, minced
- 1 Asian pear, grated (or apple in a pinch)
- 1 onion, diced
- 2 carrots, cut into chunks
- 3 cups beef stock
- Sliced green onions and toasted sesame seeds for garnish
The Korean-Inspired Method:
- Combine soy sauce, brown sugar, rice wine, sesame oil, garlic, ginger, and grated pear to create a marinade.
- Season ribs with salt and pepper, then sear in a hot Dutch oven until browned on all sides. Set aside.
- Add onion and carrots to the pot, cooking until softened.
- Pour in the marinade and stock, scraping up browned bits with your DI ORO spatula.
- Return ribs to the pot, bring to a simmer, cover and transfer to a 325°F oven for 2.5-3 hours, until meat is tender enough to pull from the bone.
Serve these gloriously tender ribs over steamed rice, garnished with green onions and sesame seeds. The combination of sweet, savory, and slightly spicy elements creates a dish that's both comforting and exciting—proof that braising transcends culinary borders. If you're looking for more inspiration, check out our tips for cooking with stainless steel to elevate your kitchen game.
Braised Pork Shoulder with Cider and Apples: Autumn in a Dutch Oven

This braising recipe captures the essence of fall, pairing pork's natural affinity for fruit with the warm spices of the season. It's like a culinary sweater—cozy, comforting, and exactly what you want when temperatures drop. For an indulgent finish to your meal, consider following up with a sweet treat like homemade soft serve ice cream.
What You'll Need:
- 4-pound boneless pork shoulder, cut into 3-inch chunks
- 2 tablespoons vegetable oil
- 2 onions, sliced
- 3 garlic cloves, minced
- 2 cups apple cider
- 1 cup chicken stock
- 2 tablespoons apple cider vinegar
- 2 tablespoons whole grain mustard
- 2 apples, cored and cut into wedges
- Fresh thyme and sage
- 2 bay leaves
The Autumnal Method:
- Season pork generously with salt and pepper. Heat oil in your Dutch oven and sear pork in batches until deeply browned on all sides.
- Add onions to the pot and cook until softened and beginning to caramelize.
- Add garlic, cook until fragrant, then pour in cider, stock, and vinegar, scraping up those flavor-packed brown bits with your DI ORO spatula.
- Stir in mustard, add herbs, and return pork to the pot. Bring to a simmer.
- Cover and transfer to a 325°F oven for 2 hours. Add apple wedges and continue cooking for 30 minutes more.
The result is pork so tender it shreds with a gentle prod, bathed in a sauce that balances the sweetness of apples and cider with savory depth. Serve over buttery egg noodles or alongside roasted potatoes for a meal that celebrates the season in every bite. Want to make meal prep even easier? Explore our curated Bundles & Sets—everything you need for seamless braising and more.
In our final installment, we'll explore how to troubleshoot common braising challenges, master make-ahead strategies for entertaining, and elevate your braising game with professional finishing touches. Until then, embrace the gentle bubble of your Dutch oven and the transformative power of time and temperature—the true heroes of every braising recipe.
Braising Troubleshooting: When Good Braises Go Bad
Even the most experienced home chefs occasionally encounter braising challenges. But with your DI ORO tools at the ready and a few pro tips in your back pocket, you'll be able to rescue almost any braising situation. Let's tackle the most common braising recipes mishaps and their solutions.
Tough Meat Even After Hours of Cooking
If your meat still feels like you're chewing on a leather boot after the recommended cooking time, don't panic! This is actually an indication that you haven't cooked it long enough. Collagen breaks down in stages, and there's an awkward middle phase where the meat can actually become more tough before it surrenders to tenderness.
The fix? Lower the temperature slightly and continue cooking for another 30-60 minutes. Keep checking every 20 minutes until your DI ORO spatula slides through the meat with minimal resistance. Remember, braising is less about time and more about reaching that magical temperature where collagen transforms into gelatin.
Watery, Bland Sauce
A thin, uninspiring sauce can make even perfectly braised meat feel like a letdown. If your braising liquid lacks body and depth, remove the meat once tender and set it aside covered with foil. Then, increase the heat and reduce the sauce uncovered until it reaches your desired consistency—usually about 10-15 minutes of steady simmering.
For flavor enhancement, consider adding a tablespoon of tomato paste, a splash of balsamic vinegar, or even a small pat of butter whisked in at the end. Your DI ORO spatula's heat resistance (tested to 600°F by America's Test Kitchen!) makes it perfect for this high-temperature reduction process without worry of melting.
Elevating Your Braising Game: Pro-Level Techniques
Ready to take your braising recipes from impressive to unforgettable? These professional techniques will add layers of flavor and refinement to your already delicious dishes.
The Power of Proper Browning
The difference between good and extraordinary braising often comes down to how seriously you take the initial searing step. For restaurant-quality results, make sure your meat is thoroughly patted dry and your pan is properly heated before searing. Work in small batches, giving each piece of meat plenty of space.
When you think the meat is browned enough, give it another minute. That deep mahogany crust isn't just for looks—it's concentrated flavor that will infuse your entire dish. Your DI ORO spatula's precision edge is perfect for testing when that crust has formed without disturbing it prematurely.
Layering Aromatics for Complexity
While basic braising recipes call for a simple mirepoix, consider creating a more complex aromatic base. Try adding fennel with your onions, incorporating a leek alongside celery, or tossing in some mushroom stems for earthy depth. Each additional aromatic adds another dimension to your final dish.
For Le Creuset braising recipes specifically, the even heat distribution of these premium Dutch ovens allows you to really develop these flavors without scorching. Use your DI ORO spatula to keep those aromatics moving until they're properly caramelized but not burned.
Finishing Touches That Make All the Difference
The final minutes of preparation can transform a good braise into an exceptional one. Consider these professional finishing moves:
- Add a splash of acid (lemon juice, vinegar, or pickled something) just before serving to brighten flavors
- Incorporate fresh herbs in the last 5 minutes of cooking
- Whisk in a small amount of cold butter for silkiness and sheen
- Top with a contrasting garnish for textural interest (gremolata, toasted nuts, crispy fried shallots)
These small additions create balance and intrigue, elevating your braising recipes from homey comfort food to restaurant-worthy cuisine.
Make-Ahead Strategies: Braising for Entertaining
One of the greatest advantages of braising recipes is that they often taste even better the next day, making them perfect for stress-free entertaining. Here's how to leverage this quality for your next dinner party.
The Three-Day Plan for Perfect Braised Dishes
For truly exceptional results, consider this professional timeline:
Day 1: Braise your main dish following your recipe, then cool completely before refrigerating overnight. This resting period allows flavors to meld and develop complexity.
Day 2: Remove the solidified fat from the surface (save this flavor-packed gold for roasting potatoes!). Gently reheat the dish, adjust seasonings, and refrigerate again. This second mellowing creates remarkable depth of flavor.
Day 3: Your serving day! Reheat slowly, adding fresh herbs or finishing touches just before presenting to your impressed guests. They'll never know your showstopping dish was mostly prepared days ago.
Freezing Braised Dishes Successfully
Most braising recipes freeze beautifully for up to three months. For best results, cool completely before freezing, and leave a little space in your container for expansion. Thaw overnight in the refrigerator before gently reheating on the stovetop or in a 325°F oven.
When reheating, your forever-chemical-free DI ORO spatula is the perfect tool for gently stirring without breaking apart your tender meat. Remember to taste and adjust seasonings after reheating, as flavors can mellow during freezing.
Beyond Traditional Braising: Creative Variations
While classic braising recipes will always have a place at the table, don't be afraid to experiment with cross-cultural techniques and unexpected ingredients.
Fusion Braising Inspirations
Try incorporating Asian ingredients into European classics—star anise and five-spice powder add intriguing notes to beef bourguignon. Or introduce Mediterranean flavors to Mexican dishes by adding olives and preserved lemon to your next chile verde. The low, slow nature of braising allows these flavor profiles to harmonize beautifully.
Unexpected Ingredients That Shine in Braising
Don't limit yourself to traditional braising components. Consider these unexpected additions that professional chefs often incorporate:
- Coffee: Adds depth and complexity to beef braising recipes
- Dark chocolate: A small amount adds richness to chili or Mexican mole-inspired braises
- Dried mushrooms: Rehydrate and add along with their soaking liquid for umami intensity
- Fermented ingredients: Miso, kimchi, or sauerkraut bring complexity and brightness
Each of these ingredients brings unexpected dimension to traditional braising recipes, helping you develop your own signature dishes over time. For specialty essentials and unique finds, check out our Specialty Tools collection—a perfect match for your creative kitchen adventures.
The Braising Mindset: Patience and Presence
Perhaps the most important aspect of mastering braising recipes isn't about technique at all—it's about mindset. Braising invites us to slow down, to appreciate transformation, and to understand that some of the most worthwhile culinary experiences can't be rushed.
As you stir your simmering pot with your trusty DI ORO spatula, take a moment to appreciate the aromas filling your kitchen. Notice how the ingredients change and soften. This isn't just cooking—it's a form of culinary meditation that reconnects us with food in a meaningful way.
Frequently Asked Questions
What foods are good for braising?
Foods that benefit most from braising are typically tougher cuts of meat with a lot of connective tissue, such as beef chuck, pork shoulder, lamb shanks, and short ribs. Root vegetables like carrots, potatoes, and turnips also braise beautifully, absorbing the cooking liquid’s rich flavors while becoming tender and delicious.
What are the basic rules of braising?
The basic rules of braising include first searing the food to develop a deep, caramelized flavor, then cooking it slowly in a small amount of liquid at low heat, either on the stove or in the oven. It’s important to cook with a covered pot to trap steam and keep the environment moist, which helps break down tough fibers and infuse flavors.
What dishes do you braise?
Classic dishes that rely on braising include coq au vin, beef bourguignon, pot roast, and osso buco. Beyond meat, you can also braise vegetables and even tofu to create rich, flavorful meals that showcase tender textures and deep, complex tastes.
What is the best liquid for braising?
The best liquid for braising depends on the flavor profile you want, but common choices include broth, wine, beer, or a combination thereof. These liquids add depth and richness, and often a splash of acid like vinegar or tomato juice is included to help tenderize the food and balance the flavors.
What types of meat are not well suited for braising?
Tender cuts like filet mignon, ribeye, or sirloin are generally not well suited for braising because they cook quickly and can become overcooked and dry with prolonged moisture and heat. Braising is best reserved for tougher, more fibrous cuts that need slow cooking to become tender.
What are 2 basic seasonings that recommended when preparing meat for braising?
Two basic seasonings recommended for braising meat are salt and black pepper. Salt enhances the meat’s natural flavors and helps with moisture retention, while black pepper adds a subtle heat and depth, making these foundational seasonings essential before adding any herbs or spices.
-
Posted in
beef braising recipes


