How To Make Soft Serve Ice Cream At Home Without Machines
The Sweet Science: Mastering Homemade Soft Serve Ice Cream Without the Fancy Gadgets
Remember that feeling? The soft, creamy swirl landing perfectly in your cone, the race against time to lick it before it melts down your hand, and that unmistakable melt-in-your-mouth texture that's somehow both substantial and ethereal? Soft serve ice cream isn't just dessert—it's a summer ritual, a childhood memory, and for many of us at DI ORO, a bit of an obsession.
But here's the thing: you don't need to chase down an ice cream truck or invest in professional equipment to create that magical swirl at home. With a few smart techniques and the right kitchen tools, you can transform basic ingredients into that signature soft, pipeable treat that makes everyone smile.
Why Make Soft Serve at Home?
Commercial soft serve machines cost hundreds (sometimes thousands) of dollars and take up valuable counter space. Plus, have you read the ingredient list on commercial soft serve mixes lately? Polysorbate 80, carrageenan, and a chemistry textbook of stabilizers aren't exactly what we'd call "kitchen staples."
Making soft serve ice cream at home lets you control exactly what goes into your dessert—no mystery ingredients, no preservatives, just simple, delicious components you can pronounce. Plus, you get to play ice cream artist with flavors that would make even the most adventurous ice cream truck jealous. If you're looking for the perfect utensils to help you get started, browse our kitchen utensils collection for high-quality tools designed for home chefs.
What Makes Soft Serve... Soft Serve?

Before we dive into whisking and mixing, let's understand what we're aiming for. Soft serve isn't just melted hard ice cream, and it's not just frozen whipped cream either. It exists in that perfect sweet spot between the two.
The Science Behind the Swirl
Commercial soft serve machines do two critical things: they simultaneously freeze and aerate the ice cream base. This creates tiny air bubbles throughout the mixture while keeping ice crystals microscopically small—resulting in that signature smooth texture that's both light and creamy.
The air content (called "overrun" in ice cream parlance) in soft serve is typically 33-45% of its volume—much higher than premium hard ice creams, which might have only 20-25% air. This is why soft serve feels lighter on the tongue and melts more quickly.
Temperature plays a crucial role too. Soft serve is typically served at around 18-22°F, while hard ice cream is stored closer to 0°F. This warmer temperature contributes to that immediate melt-in-your-mouth sensation we all crave.
The Challenge for Home Cooks
Without a soft serve ice cream machine, we need to find clever workarounds to achieve both the aeration and the perfect freezing temperature. The good news? With a few smart techniques, we can get remarkably close to the real thing—and in some ways, even better it.
Think of it like jazz—we might not have the full orchestra, but with the right notes and rhythm, we can still make beautiful music. And in this case, delicious ice cream that will have everyone asking for seconds.
Your Soft Serve Toolkit: What You'll Need
Before we jump into methods, let's gather our equipment. The beauty of homemade soft serve is that you don't need specialized gear—just a few kitchen workhorses that pull double duty. For all-in-one value, check out our kitchen tool bundles & sets that include all the essentials for your ice cream adventures.
Essential Tools
- Stand mixer or hand mixer: Your secret weapon for creating air-whipped volume
- Freezer-safe container: For chilling your base and storing any leftovers (though let's be honest—leftovers are rare)
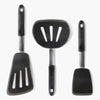
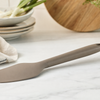
- Flexible silicone spatula: For gently folding ingredients without deflating all that precious air (America's Test Kitchen awarded DI ORO's Seamless Series spatula as their top pick for a reason—it's perfect for delicate folding)
- Piping bag with large star tip: For that classic soft serve swirl (a heavy-duty zip-top bag with the corner snipped works in a pinch)
- Digital thermometer: Optional but helpful for monitoring temperatures
Basic Ingredients
The simplest soft serve base requires just a handful of ingredients:
- 2 cups heavy cream
- 1 cup whole milk
- 3/4 cup granulated sugar
- 1/4 teaspoon fine sea salt
- 2 teaspoons vanilla extract
- Optional: 2 tablespoons dry milk powder (for extra creaminess)
These create the foundation for our homemade soft serve adventure. The beauty of making it yourself is the ability to adjust ratios based on your preferences—want it richer? Add more cream. Lighter? More milk. The kitchen is your laboratory, and you're the mad scientist.
The No-Machine Methods: Three Approaches to Homemade Soft Serve

Without a soft serve ice cream machine, we need to get creative. I've tested countless methods over the years, and these three consistently deliver the closest results to professional soft serve. Each has its own character—think of them as different members of the soft serve family.
Method 1: The Whipped Cream Approach
This method leverages the natural aeration of whipped cream to create a light, pipeable texture. It's the quickest route to soft serve satisfaction.
The basic process:
- Gently heat cream, milk, and sugar just until sugar dissolves (don't boil)
- Stir in vanilla and salt, then chill mixture thoroughly (at least 4 hours or overnight)
- Whip the cold mixture to stiff peaks using a stand or hand mixer
- Freeze for 1-2 hours until firm enough to pipe but still soft
- Transfer to a piping bag and swirl immediately
The result is incredibly light and airy—almost like frozen whipped cream with more structure. It melts quickly, so have those napkins ready! This method works beautifully when you want that classic vanilla soft serve experience.
Method 2: The No-Churn Condensed Milk Magic
This approach borrows from the popular no-churn ice cream technique, using sweetened condensed milk as both sweetener and stabilizer. For further reading, check out Bigger Bolder Baking's guide to homemade soft serve or explore I Am Baker's soft serve ice cream recipe for more inspiration.
The basic process:
- Whip 2 cups heavy cream to stiff peaks
- Fold in one 14-oz can of sweetened condensed milk, vanilla, and salt
- Freeze until semi-firm (about 2-3 hours), stirring once halfway through
- When pipeable but still soft, transfer to a piping bag
This method creates a richer, more substantial soft serve that holds its shape longer. The condensed milk provides both sweetness and body, while preventing large ice crystals from forming. The trade-off is a slightly denser texture than commercial soft serve, but with incredible flavor.
Method 3: The Hybrid "Franken-Serve" (My Personal Favorite)
After years of experimentation, I've found this method produces the closest approximation to professional soft serve ice cream without a machine. It combines elements of both previous methods.
The basic process:
- Heat 1 1/2 cups cream, 1 cup milk, and 1/2 cup sugar until dissolved
- Stir in vanilla, salt, and 2 tablespoons dry milk powder (the secret weapon)
- Chill mixture thoroughly
- Whip to soft peaks, then fold in 1/4 cup sweetened condensed milk
- Freeze for exactly 90 minutes, then whip again briefly
- Freeze another 30-45 minutes until pipeable
This method balances the lightness of whipped cream with the stabilizing power of condensed milk. The dry milk powder adds body without heaviness, while the double-whipping creates that perfect soft serve texture. It's a bit more work, but the results are worth it.
Understanding What Makes Soft Serve Unique
When you bite into perfect soft serve, you're experiencing a culinary balancing act. That distinctive texture—somewhere between ice cream and mousse—isn't just about temperature. It's about structure, air content, and the precise moment of serving. At DI ORO, we're fascinated by these kitchen science moments that transform simple ingredients into something magical.
The Secret's in the Air (and Temperature)
Commercial soft serve contains 33-45% air by volume (compared to premium hard ice cream's 20-25%). This higher "overrun" creates that signature lightness that melts instantly on your tongue. Soft serve also lives in the temperature sweet spot—around 18-22°F—warmer than hard ice cream but cold enough to hold its shape. Without specialized equipment, we need clever workarounds to achieve both.
Think of it like whipping up the perfect meringue—it's all about creating structure from air, then stabilizing it at just the right moment. Your DI ORO silicone spatula (the same one America's Test Kitchen awarded for its perfect flexibility) becomes your MVP for folding in air without deflating your mixture. Explore our award-winning Seamless Series spatulas to make your soft serve prep even easier.
Three Tested Methods for Homemade Soft Serve Success

After testing dozens of approaches in my kitchen, I've narrowed it down to three methods that consistently deliver that authentic soft serve experience—no soft serve ice cream machine required. Each has distinct advantages depending on your ingredients, time, and texture preferences.
Method 1: The Quick-Freeze Technique
This method uses salt and ice to rapidly chill your mixture, mimicking the quick-freeze action of commercial machines:
- Combine 1 cup heavy cream, ½ cup milk, ⅓ cup sugar, and 1 tsp vanilla in a small sealable bag
- Place this bag inside a larger bag filled with ice and ⅓ cup salt
- Shake vigorously for 7-10 minutes (perfect time to build those arm muscles!)
- Once thickened, transfer to a piping bag and serve immediately
The rapid freezing while agitating prevents large ice crystals, while the constant movement incorporates air. The result is remarkably close to machine-made soft serve, though in smaller batches. It's perfect for spontaneous cravings or entertaining kids who love the hands-on process.
Method 2: The Pre-Whipped Approach
This technique front-loads the aeration before freezing:
- Whip 2 cups cold heavy cream, ½ cup sugar, and 1 tsp vanilla to stiff peaks
- Fold in ¼ cup cold milk using your DI ORO spatula with gentle, sweeping motions
- Transfer to a freezer-safe container and freeze for exactly 2 hours
- Stir gently, then transfer to a piping bag
The pre-whipping creates the air structure, while the brief freeze time keeps it from hardening completely. This method yields an ethereally light soft serve that's closest to the whipped varieties you might find at higher-end ice cream shops. The trade-off? It melts quickly, so serve immediately!
Method 3: The Stabilized Blend (Most Foolproof)
This approach uses a blend of ingredients that naturally prevent ice crystallization:
- Blend 1 cup heavy cream, ½ cup sweetened condensed milk, ¼ cup whole milk, and 1 tsp vanilla
- Chill mixture thoroughly (at least 2 hours)
- Whip until volume increases by about 30%
- Freeze for 1.5-2 hours, stirring once halfway through
- When it reaches soft-serve consistency, transfer to piping bag
The condensed milk contains both sugar and milk proteins that inhibit ice crystal formation, while the whipping incorporates just enough air. This method creates a more stable soft serve that holds its shape longer and can even be refrozen if you have leftovers (though fresh is always best!). For another no-machine method, you might enjoy Handle the Heat's guide to making ice cream without a machine.
Flavor Your Soft Serve Ice Cream Like a Pro
The beauty of homemade soft serve is customization. While vanilla makes a perfect canvas, don't stop there! Here are some mix-in ideas that work beautifully with your homemade soft serve:
Classic Flavor Infusions
- Real Vanilla Bean: Split and scrape a vanilla bean into your cream mixture before chilling for intense flavor
- Cold-Steeped Coffee: Add 2 Tbsp espresso powder or ¼ cup cold brew concentrate to your base
- Chocolate Perfection: Whisk 3 Tbsp cocoa powder and 2 oz melted chocolate into your warm cream mixture
- Fresh Mint: Steep 1 cup fresh mint leaves in your warm cream for 30 minutes, then strain
Creative Mix-Ins (Add Just Before Serving)
- Cookie Butter Swirl: Warm 3 Tbsp cookie butter until just pourable, then ribbon through your soft serve
- Cereal Milk: Replace regular milk with milk steeped in your favorite cereal, then strained
- Miso Caramel: Whisk 1 tsp white miso into ¼ cup warm caramel for a sweet-savory revelation
- Fruit Ripples: Reduce 1 cup berries with 2 Tbsp sugar until jammy, cool completely before swirling
The key with mix-ins is timing—add them too early and they'll sink; too late and they won't incorporate. Aim for that sweet spot when your soft serve is just starting to set but still easily stirred.
Troubleshooting Your Homemade Soft Serve

Even with the best methods, homemade soft serve can be temperamental. Here's how to address common issues:
Texture Troubles
| Problem | Likely Cause | Solution |
|---|---|---|
| Too icy/crystallized | Insufficient fat or air incorporation | Add 1 Tbsp corn syrup or increase cream ratio |
| Too soft/won't hold shape | Under-frozen or over-whipped | Freeze 30 minutes longer or start with colder ingredients |
| Too dense/hard | Over-frozen or insufficient air | Let soften 5-10 minutes or re-whip briefly |
| Grainy texture | Large ice crystals formed during freezing | Ensure base is very cold before freezing; add 1 Tbsp vodka |
The "Just Right" Moment
The trickiest part of homemade soft serve is catching it at that perfect consistency. Too soon, and it's soupy; too late, and it's hard ice cream. Look for the "spoonable but holds peaks" stage—when your spatula leaves a trail that slowly fills in. This is your window for transferring to a piping bag and creating those perfect swirls.
If you miss that window, don't panic! Let over-frozen soft serve sit at room temperature for 5-10 minutes, then give it a quick stir with your DI ORO spatula to refresh the texture. The silicone's flexibility is perfect for working with partially frozen desserts without damaging them.
Serving Your Homemade Soft Serve with Style
You've mastered the mixture—now it's time to serve with flair. The presentation is half the fun with soft serve!
Creating the Perfect Swirl
The iconic soft serve swirl isn't just for looks—it maximizes surface area for optimal melt-in-your-mouth experience. Here's how to nail it:
- Use a piping bag fitted with a large star tip (or snip a 1/2-inch opening from a plastic bag)
- Fill bag only ⅔ full to maintain control
- Start from the center of your cone or bowl, applying steady pressure
- Move in a circular motion while slowly building upward
- Finish with a quick twist of the wrist to create the perfect peak
Practice makes perfect, so don't worry if your first few swirls look more abstract than professional. They'll still taste amazing, and you'll quickly develop your signature style.
Elevating Your Homemade Soft Serve Game
When you're making soft serve ice cream at home without a soft serve ice cream machine, the right tools make all the difference. At DI ORO, we've seen how our seamless silicone spatulas—the very ones that earned America's Test Kitchen's top honors—become the unsung heroes of homemade frozen treats. Their flexible edges scrape every bit of your precious mixture from bowl to piping bag, while their heat resistance means you can stir warm bases without worry.
The Perfect Serving Vessels
- Classic Cake Cones: The nostalgic choice that lets the soft serve shine
- Waffle Bowls: Perfect for elaborate sundae creations
- Chilled Glass Dishes: Pre-freeze for 30 minutes to keep your soft serve from melting too quickly
- Cookie Cups: Press cookie dough into muffin tins, bake, and cool for an edible vessel
Pro tip: Whatever vessel you choose, keep it in the freezer until the moment you're ready to serve. This simple step buys you precious extra minutes before melting begins.
Toppings That Complement Soft Serve
The best toppings for soft serve ice cream enhance rather than overwhelm its delicate texture:
- Magic Shell: That crackling chocolate coating creates magical textural contrast
- Toasted Coconut: Light enough not to sink, with perfect crunch
- Freeze-Dried Fruit: Intense flavor without the moisture that causes melting
- Warm Sauce Drizzles: The temperature contrast between warm sauce and cold soft serve creates flavor fireworks
Remember that with soft serve, less is more. Choose one or two complementary toppings rather than piling on everything in your pantry. The star of the show should always be that perfectly swirled, cloud-like creation you've worked so hard to perfect.
Making Soft Serve Ice Cream for a Crowd
Serving homemade soft serve at a gathering requires strategy. Without a soft serve ice cream machine, you'll need to work in batches or adapt your approach. Here's how to make it happen:
The Pre-Batch Method
Prepare your base mixture up to 24 hours in advance, but stop before the final freezing stage. Store in the refrigerator until 2-3 hours before serving time. Then:
- Complete the freezing process according to your chosen method
- Set up a serving station with pre-chilled cones, bowls, and toppings
- Consider preparing multiple flavors in smaller batches rather than one large batch
- Keep extra batches in the freezer, rotating them out as needed
For more dessert inspiration, try our coconut sorbet recipe for a dairy-free soft serve alternative. Or, if you're looking for gluten-free options, our gluten-free waffle recipe makes the perfect bowl for your homemade soft serve.
For the ultimate soft serve party, consider setting up a DIY topping bar. Pre-portion toppings in small bowls, provide squeeze bottles for sauces, and let guests create their own masterpieces. It's interactive, fun, and takes some pressure off you as the host.
Soft Serve Variations Around the World
While we've focused on classic American-style soft serve, cultures worldwide have their own versions worth exploring:
- Japanese Soft Cream: Higher milk fat content with unique flavors like matcha, black sesame, or hojicha
- Italian Fiordilatte: Milk-forward with less air, often served with a drizzle of olive oil and sea salt
- Thai Coconut Soft Serve: Made with coconut milk and often served in a fresh coconut half
- Mexican Nieve de Garrafa: Hand-churned in copper pots, featuring tropical fruits and cinnamon
Want to expand your dessert repertoire? Explore our guide to the best K-Cups for coffee ice cream pairings, or browse our rubber scraper article to learn how the right tools make frozen treats easier.
Each variation offers inspiration for your homemade creations. The beauty of making soft serve at home is that you can experiment with these global influences while using your favorite method.
Why Homemade Soft Serve Matters
In a world of instant gratification and store-bought convenience, why bother making soft serve ice cream at home? Because like all worthwhile kitchen adventures, it connects us to something deeper than just food.
When you create soft serve from scratch, you're participating in a culinary tradition that spans generations and cultures. You're taking control of what goes into your dessert—choosing quality cream, real vanilla, and ingredients you can pronounce. And most importantly, you're creating memories, whether it's kids shaking ice bags on a summer afternoon or friends gathering around your kitchen island for an impromptu dessert party.
The DI ORO Difference
At DI ORO, we believe the tools you use should make cooking more joyful, not more complicated. Our forever-chemical-free silicone spatulas aren't just for folding cake batter or flipping pancakes—they're for every culinary adventure, including your homemade soft serve journey. Their seamless design means no bacteria hiding spots, while their flexibility makes them perfect for scraping every last bit of creamy goodness from your mixing bowl.
If you want to take your dessert making to the next level, check out our detailed guide on spatulas—the unsung heroes of soft serve and beyond. For more kitchen tips, discover how to cook eggs on stainless steel for a perfect brunch pairing with your ice cream.
Frequently Asked Questions
How do you make ice cream into soft serve?
To make ice cream into soft serve, you need to whip air into the ice cream mix while it freezes, creating a lighter, creamier texture. This process is typically done using a specialized soft serve machine that continuously churns and freezes the mixture to keep it smooth and soft. The key is maintaining the right temperature and incorporating enough air, known as overrun, to achieve that signature soft serve consistency.
How to make soft ice cream at home?
Making soft ice cream at home involves using a soft serve machine or a regular ice cream maker with frequent stirring to incorporate air as it freezes. You can prepare a basic ice cream mix with milk, cream, sugar, and flavorings, then chill it thoroughly before churning. For a softer texture, serve the ice cream immediately after churning, before it hardens in the freezer.
What is soft serve ice cream mix made of?
Soft serve ice cream mix typically contains milk, cream, sugar, and stabilizers or emulsifiers to improve texture and shelf life. It often includes flavorings like vanilla or chocolate, and sometimes non-fat milk solids to enhance creaminess without adding extra fat. The precise blend allows the mixture to freeze quickly and maintain a smooth, airy consistency when dispensed.
Can I make soft serve without a machine?
While a machine is ideal for authentic soft serve, you can approximate it at home by whipping your ice cream mixture vigorously as it freezes to incorporate air. Using a hand mixer or whisk during the freezing process helps create a lighter texture, though it won't be as smooth or consistent as machine-made soft serve. Alternatively, letting store-bought ice cream soften slightly before serving can mimic the soft serve experience.
What is the secret to soft ice cream?
The secret to soft ice cream lies in the balance of air incorporation, fat content, and freezing temperature. By whipping air into the mixture as it freezes and keeping it at a slightly warmer temperature than hard ice cream, soft serve achieves its creamy, smooth texture. Stabilizers and emulsifiers also play a role by preventing ice crystals from forming and maintaining softness.
What are the ingredients in Dairy Queen soft serve ice cream?
Dairy Queen's soft serve ice cream is made from a blend of milk, sugar, non-fat milk solids, vegetable oil, and stabilizers like guar gum and carrageenan. It contains no eggs and is formulated to have a lower fat content than traditional ice cream, which contributes to its light, creamy texture. This proprietary mix is designed for quick freezing and smooth dispensing from their machines.
-
Posted in
soft serve ice cream mix