Measuring Equipment for Baking: Precision Made Easy
Key Takeaways
- Baking requires precise measurements to achieve the desired texture and rise.
- Even a small change, like adding ¼ cup too much flour, can significantly alter the outcome.
- Unlike cooking, baking does not allow for adjustments once the batter is heated.
- Accurate measuring equipment is essential for consistent baking results.
Table of Contents
- Why Precision Matters: The Science Behind Baking Measurement
- The Essential Measuring Tools Every Baker Needs
- Volume vs. Weight: Choosing Your Measurement Strategy
- Materials Matter: Durability & Precision in Measuring Tools
- Advanced Techniques: Measuring Like a Pro
- Common Measuring Mistakes & Solutions
- Building Your Baking Measurement Arsenal: A Starter Guide
- Materials That Maintain Precision Over Time
- Professional Measuring Techniques
- Troubleshooting Common Measurement Problems
- Precision Tools, Precision Results
Why Precision Matters: The Science Behind Baking Measurement
Baking is chemistry in action, where precise ratios determine whether your soufflé rises triumphantly or your cookies turn dense and bitter. Add just ¼ cup too much flour, and you've altered the protein-to-liquid ratio enough to create a completely different texture. Unlike cooking, where you can adjust seasonings mid-process, baking locks in your measurements the moment heat hits the batter.
The volume versus weight discrepancy reveals why so many home bakers struggle with consistency. A cup of packed flour weighs roughly 150 grams, while the same cup of lightly spooned flour weighs only 125 grams, a 20% difference that can make or break your recipe. Studies show that inconsistent measurement causes 60-70% of home baking failures, making proper measuring equipment for baking your first line of defense against disappointment.
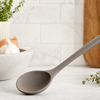
Just as DI ORO's award-winning spatulas ensure precision in execution with their 600°F heat resistance and pro-grade silicone, accurate measuring tools set the foundation for baking success. The right equipment eliminates guesswork and transforms baking from gambling to genuine skill-building. For a comprehensive solution, consider the 8-piece 18/8 stainless steel measuring cup and spoon set for all your measuring needs.
The Essential Measuring Tools Every Baker Needs

Dry Measuring Cups: The Foundation
Dry measuring cups are designed to be filled to the brim and leveled flat, a critical distinction from their liquid counterparts. The standard quartet (¼ cup, ⅓ cup, ½ cup, 1 cup) exists because baking recipes rely on precise ratios, and that oddball ⅓ cup becomes essential when scaling recipes or working with traditional formulations that call for thirds.
Stainless steel trumps plastic for durability and accuracy retention. While plastic cups may cost less initially, they warp over time, affecting measurement precision. Quality stainless steel cups maintain their shape for decades, resist staining from ingredients like cocoa powder, and survive countless dishwasher cycles without degradation. For more on why stainless steel is the gold standard, read this in-depth guide to stainless steel measuring cups.
Master the "spoon and level" technique: spoon your ingredient into the cup rather than scooping directly from the container, then level with a straight edge. This prevents the compaction that occurs when you plunge a measuring cup into flour, which can add 15-20% extra ingredient to your recipe.
Liquid Measuring Cups: Precision at Eye Level
Liquid measuring cups feature headspace above the measurement lines and a pouring spout, design elements that prevent overflow and enable accurate reading. The 1-cup size handles most everyday needs, while 2-cup and 4-cup versions become invaluable for batch baking or recipes requiring multiple liquid ingredients. To learn more about choosing the right liquid measuring cup, check out this helpful blog post on liquid measuring cups.
Glass offers superior heat resistance and clarity for reading measurements, making it ideal for recipes involving warm liquids like melted butter or heated milk. Durable plastic provides lightweight convenience and break-resistance, though it may discolor over time with certain ingredients. Always read measurements at eye level, viewing from above creates optical distortion that can throw off accuracy by several tablespoons.
Measuring Spoons: Small Quantities, Big Impact
The standard progression (¼ teaspoon, ½ teaspoon, 1 teaspoon, 1 tablespoon) covers the precise increments needed for leavening agents, extracts, and spices. These small quantities pack outsized impact, incorrectly leveling 1 teaspoon of baking powder can cause your cake to either refuse to rise or overflow your pan.
Consider investing in two sets: one for wet ingredients and another for dry. This prevents cross-contamination and eliminates the need to wash and dry spoons mid-recipe. When measuring dry ingredients in spoons, level them just as meticulously as you would measuring cups, that extra pinch of salt or baking soda can dramatically alter your final product. For a reliable option, try the 4-piece 18/8 stainless steel measuring spoon set.
Digital Kitchen Scale: The Accuracy Game-Changer
Professional bakers prefer weight measurements because they eliminate variables caused by ingredient density and packing methods. A quality digital scale with tare function (reset to zero), gram/ounce toggle, and ±1-gram accuracy provides professional-grade precision for under $50.
The tare function revolutionizes multi-ingredient recipes: place your bowl, hit tare, add the first ingredient until you reach the target weight, hit tare again, and repeat. This technique lets you measure all ingredients into one bowl without transferring or dirtying multiple containers. When properly using measuring equipment for baking, this method saves time and improves accuracy simultaneously.
Thermometers: Temperature Control for Precision
Most home ovens vary 25-50°F from their dial settings, making an oven thermometer essential for consistent results. Candy and instant-read thermometers become crucial for advanced techniques, soft-ball caramel requires 234-240°F, while hard-crack stage demands 300-310°F precision.
Test thermometer accuracy by checking ice water (should read 32°F) and boiling water (should read 212°F). If readings vary by more than 2-3 degrees, replace the thermometer or note the offset for mental adjustment during use.
Volume vs. Weight: Choosing Your Measurement Strategy
Volume measurements vary because ingredient density differs dramatically, 1 cup of packed brown sugar weighs roughly 213 grams, while 1 cup of powdered sugar weighs only 120 grams. This massive difference explains why your cookies turn out dense when you accidentally pack flour like brown sugar.
Weight measurements eliminate these variables entirely. Professional bakers rely on scales because 240 grams of flour always equals 240 grams, regardless of how it's scooped, packed, or settled. This consistency becomes crucial when scaling recipes, doubling a cake recipe measured by weight takes seconds, while doubling volume measurements introduces compounding errors.
For beginners, mastering proper volume techniques builds foundational skills before graduating to weight measurements. Start with the spoon-and-level method for flour, learn to read liquid measurements at eye level, and understand when brown sugar should be packed versus when powdered sugar should be sifted. Once these techniques become second nature, a digital scale transforms your precision from good to professional-grade.
| Measurement Method | Accuracy Level | Best For | Learning Curve |
|---|---|---|---|
| Volume (Cups/Spoons) | Good with proper technique | Everyday baking, beginners | Moderate - requires consistent technique |
| Weight (Digital Scale) | Professional precision | Advanced recipes, scaling batches | Easy once you own a scale |
| Hybrid Approach | Excellent | Home bakers wanting flexibility | Combines both skill sets |
Materials Matter: Durability & Precision in Measuring Tools
Stainless steel measuring equipment maintains accuracy longer than any other material. Unlike plastic cups that warp in dishwashers or wooden spoons that absorb flavors, stainless steel resists denting, staining, and dimensional changes that compromise measurements. A quality stainless steel measuring set lasts 10-15 years while maintaining the same precise volumes, making it a worthwhile investment for serious bakers. If you want a full set, the 4-piece 18/8 stainless steel measuring cup set is a great choice.
Glass liquid measuring cups offer superior readability and heat tolerance, essential when measuring warm ingredients like melted butter or cooled simple syrup. The transparency eliminates guesswork at measurement lines, while the non-reactive surface prevents flavor absorption. Plastic alternatives work for cold liquids but can discolor, develop odors, and lose clarity over time, making accurate readings difficult.
Avoid measuring tools with nonstick coatings or decorative finishes that can chip or wear away. These surface treatments alter the internal volume as they degrade, turning your once-accurate ¼ cup into an unpredictable measurement. Similarly, flexible silicone measuring cups may seem convenient, but they can compress slightly under pressure, affecting volume consistency in critical recipes.
Advanced Techniques: Measuring Like a Pro

The spoon-and-level method eliminates the most common measuring error in home baking. Instead of scooping flour directly from the bag, which compacts it and adds 15-20% extra flour, spoon the ingredient loosely into your measuring cup, then level with a straight edge. This technique ensures consistent density every time, preventing dense, tough baked goods caused by excess flour. For more tips on improving your baking accuracy, read this guide to stainless steel measuring spoons for spices.
Taring your digital scale between ingredients streamlines multi-component recipes. Place your mixing bowl on the scale, hit tare to zero it out, add your first ingredient until you reach the target weight, then tare again before adding the next ingredient. This eliminates transferring between containers and reduces cleanup while maintaining precision throughout the entire recipe.
Sticky ingredients like peanut butter, honey, or shortening require special handling. Lightly coat your measuring spoon with neutral oil before measuring, the ingredient slides out cleanly without waste or guesswork about "heaping" versus "level" measurements. Better yet, weigh these ingredients directly: 3 tablespoons of peanut butter equals exactly 45 grams, regardless of brand thickness or temperature.
Verify your scale's accuracy monthly using common household items with known weights. A penny weighs 2.5 grams, a nickel weighs 5 grams, and a new stick of butter weighs 113 grams. If your scale reads more than 2-3 grams off these targets, it's time for recalibration or replacement to maintain the precision your measuring equipment for baking demands.
Common Measuring Mistakes & Solutions
Inconsistent results batch to batch usually stem from volume measurement variations rather than recipe problems. When your chocolate chip cookies turn out perfect one week and dense the next, the culprit is likely flour measurement inconsistency. Switch to weighing flour (240 grams per cup) or strictly follow the spoon-and-level method to eliminate this variable entirely.
Kitchen scales lose accuracy over time due to dust accumulation around sensors and natural calibration drift. Clean your scale regularly with a damp cloth, avoiding harsh chemicals that can damage sensitive components. Test accuracy monthly and replace batteries promptly, low battery power affects sensor precision before the low-battery warning appears.
Converting weight-based recipes to volume measurements introduces approximation errors, but sometimes it's necessary. Use these conversions as starting points: flour approximately 240g per cup, granulated sugar 200g per cup, and butter 226g per cup. However, invest in a basic digital scale ($25-35) for long-term accuracy rather than relying on conversions for serious baking projects.
Building Your Baking Measurement Arsenal: A Starter Guide
Beginner Baker Essentials
Start with stainless steel dry measuring cups (stainless steel set of 4), a 2-cup glass liquid measuring cup, measuring spoons, and a basic kitchen timer. This $40-60 foundation covers 80% of everyday baking needs without overwhelming your drawer space.
Stainless steel measuring cups resist warping and maintain accuracy longer than plastic alternatives. Glass liquid cups provide clear measurement lines and handle hot ingredients safely, essential when recipes call for warm milk or melted butter.
Intermediate Baker Upgrades
Add a digital kitchen scale with tare function and an instant-read thermometer. The scale eliminates flour-packing guesswork entirely, while the thermometer opens doors to caramel, candy, and temperature-sensitive doughs.
Consider a second set of measuring spoons to prevent cross-contamination between wet and dry ingredients. Professional bakers swear by this simple efficiency hack.
Advanced Baker Toolkit
High-precision digital scales (±0.1g accuracy) enable professional-level consistency. Multiple measuring sets speed workflow during complex recipes. Cookie scoops ensure uniform portion sizes across batches.
At this level, measuring equipment for baking becomes about speed and scalability rather than just accuracy.
Materials That Maintain Precision Over Time

Cheap measuring tools lose accuracy within months. Plastic cups warp in dishwashers, affecting volume measurements. Flimsy spoons bend under thick batters, making leveling impossible.
| Material | Durability | Heat Tolerance | Maintenance | Lifespan |
|---|---|---|---|---|
| Stainless Steel | Dent-resistant | Dishwasher safe | Minimal | 10+ years |
| Tempered Glass | Break-resistant | Heat-safe to 400°F | Easy cleaning | 8-10 years |
| Quality Plastic | Lightweight | Hand wash recommended | Can stain/absorb odors | 3-5 years |
Stainless steel measuring cups maintain their shape and volume accuracy through thousands of uses. Glass liquid measures resist clouding and provide crystal-clear measurement lines. Both materials handle commercial dishwasher cycles without degradation.
Avoid measuring tools with nonstick coatings, the coating chips over time, altering measurement accuracy and potentially contaminating food.
Professional Measuring Techniques
Spoon-and-Level Method Mastery
Professional bakers never scoop flour directly from containers. Instead, they spoon flour lightly into measuring cups, then level with a straight edge. This prevents over-packing that adds 15-20% extra flour, enough to turn tender cookies into hockey pucks.
For brown sugar, the opposite applies: pack firmly until it holds the cup's shape when turned out. This consistency separates amateur from professional results.
Scale Taring for Multi-Ingredient Efficiency
Place your mixing bowl on the scale, hit tare, add the first ingredient to target weight, hit tare again, repeat. This technique measures all dry ingredients into one bowl without transferring, saving time and reducing cleanup.
Professional bakeries rely on this method for speed and accuracy when scaling recipes up or down.
Sticky Ingredient Solutions
Coat measuring spoons with neutral oil before measuring peanut butter, honey, or shortening. Ingredients slide out cleanly, ensuring accurate measurements. Better yet, weigh sticky ingredients directly, 3 tablespoons of peanut butter varies wildly by user interpretation, but 45 grams delivers consistency every time. For more on the best tools for sticky batters and doughs, see this review of top-rated seamless spatulas for baking.
Troubleshooting Common Measurement Problems
Inconsistent results batch after batch? The culprit usually lies in measurement technique, not recipe formulation. Here's how to diagnose and fix the most common issues.
Quick Accuracy Check
Test your digital scale with known weights: a penny weighs 2.5g, a nickel weighs 5g. If readings vary by more than 0.5g, your scale needs calibration or replacement.
When recipes specify weight but you only have volume measures, use these approximations: flour ~240g per cup, granulated sugar ~200g per cup, butter ~226g per cup. Remember, these are estimates, actual weight measurements always prove more reliable.
Oven thermometer readings that don't match your candy thermometer? Test both in ice water (should read 32°F) and boiling water (should read 212°F). Significant variations indicate one or both thermometers need replacement. For more on oven accuracy, see this guide to calibrating your oven.
Precision Tools, Precision Results

Just as DI ORO's award-winning spatulas ensure precision in execution, tested to 600°F and crafted with forever-chemical-free silicone, accurate measuring equipment for baking sets the foundation for consistent success. The right tools empower you to bake boldly, experiment confidently, and create memorable results every time. Invest in quality, and your kitchen will thank you with every perfect batch.
Frequently Asked Questions
Why is precise measurement so critical in baking compared to cooking?
Baking is a science where exact ratios of ingredients determine texture and rise, leaving no room for adjustment once heated. Unlike cooking, where you can tweak flavors mid-process, even a small measurement error in baking can drastically alter the final result.
What are the advantages of using stainless steel measuring cups over plastic ones?
Stainless steel measuring cups offer superior durability, resist warping, and provide more precise measurements due to their rigid structure. They’re also easier to clean, won’t stain or absorb odors, and maintain accuracy over time compared to plastic alternatives.
How does the 'spoon and level' technique improve the accuracy of measuring dry ingredients?
The 'spoon and level' method prevents packing dry ingredients like flour, which can cause over-measuring. By spooning the ingredient into the cup and leveling it off, you ensure a consistent, light measurement that aligns with recipe expectations for better baking results.
When should I use volume measurements versus weight measurements in baking?
Volume measurements are convenient for quick recipes and liquid ingredients, but weight measurements provide greater precision and consistency, especially for dry ingredients like flour. For reliable results and to avoid variability, weighing ingredients is the preferred method for serious bakers.
Please upload banner from store admin blog pages