Vanilla Bean Ice Cream Recipe: 5 Secrets To Creamy Success
Making exceptional vanilla bean ice cream at home isn't just possible—it's transformative. The perfect vanilla bean ice cream recipe combines simple ingredients with precise technique to create a dessert that's worlds apart from store-bought versions.
Those tiny black specks aren't just for show; they're flavor bombs that elevate your frozen creation from ordinary to extraordinary. And with the right tools and know-how, you'll be churning out silky-smooth, restaurant-quality results that make you question why you ever settled for the stuff in cardboard containers.
Key Takeaways
- Homemade vanilla bean ice cream offers a transformative and superior taste compared to store-bought versions.
- The recipe uses simple ingredients combined with precise techniques to achieve creamy perfection.
- Vanilla bean specks provide intense flavor that elevates the ice cream's quality.
- Using the right tools and knowledge results in silky-smooth, restaurant-quality ice cream.
- This approach makes you reconsider settling for pre-packaged ice cream options.
Table of Contents
- The Vanilla Bean Ice Cream Revolution: Secrets to Creamy Homemade Perfection
- Why Vanilla Bean Ice Cream Deserves Your Attention
- Essential Ingredients: Why Quality Makes or Breaks Your Ice Cream
- Equipment Essentials: Tools That Make the Difference
- The Preparation Process: Starting Your Vanilla Bean Journey
- The Preparation Process: Crafting Your Vanilla Bean Ice Cream Base
- Chilling Strategies: The Critical Step Most Recipes Overlook
- The Churning Process: Transforming Liquid to Luxury
- Hardening and Storage: Preserving Your Creamy Creation
- Troubleshooting Common Vanilla Bean Ice Cream Challenges
- Serving Suggestions: Elevating Your Vanilla Bean Creation
- Advanced Variations and Customizations: Making It Your Own
- Professional Chef Secrets for Vanilla Bean Excellence
- Perfect Pairings: Complementing Your Culinary Creations
- Storing for Longevity: Preserving Your Frozen Masterpiece
- The Joy of Vanilla Bean Mastery
I've spent years perfecting my vanilla bean ice cream technique, and I'm about to share every creamy secret I've discovered along the way. Whether you're using a Cuisinart, KitchenAid, or any ice cream maker, these principles apply universally—and they'll revolutionize your homemade ice cream game forever.
Why Vanilla Bean Ice Cream Deserves Your Attention

Let's address the elephant in the room: vanilla isn't boring—it's foundational. Think of vanilla bean ice cream as the little black dress of desserts. It stands perfectly on its own while playing well with everything from warm apple pie to chocolate brownies. But there's a world of difference between mediocre vanilla and exceptional vanilla bean ice cream.
The secret lies in those tiny seeds scraped from inside a real vanilla bean pod. Unlike extract alone, vanilla beans contain over 250 flavor compounds that create a complex, floral, and slightly woody profile that extract simply can't match. When you see those signature specks distributed throughout perfectly churned cream, you're looking at flavor in its purest form.
French vs. Philadelphia Style: Choosing Your Base
Before we dive into technique, you need to make a fundamental choice that will define your vanilla bean ice cream recipe: French-style (custard-based with egg yolks) or Philadelphia-style (eggless).
French-style ice cream creates a custard base using egg yolks, resulting in a richer, creamier texture with a silky mouthfeel. This is the style you'll find in premium ice cream shops and is often considered the gold standard for vanilla bean ice cream. The best French vanilla bean ice cream recipe will have a luxurious density that coats your spoon (and your palate) with velvety perfection.
Philadelphia-style (sometimes called American-style) skips the eggs for a simpler preparation that lets the pure flavor of cream and vanilla beans shine through. It's slightly lighter but still utterly delicious, and it's my go-to when I want vanilla bean ice cream without the fuss of tempering eggs.
Both styles have their merits—I'll share recipes for each so you can decide which team you're on. Spoiler alert: you might need to make both to truly decide.
essential-ingredients-quality-matters">Essential Ingredients: Why Quality Makes or Breaks Your Ice Cream
The beauty of vanilla bean ice cream lies in its simplicity, which means each ingredient plays a crucial role. Let's break down what you'll need and why quality matters:
The Vanilla Bean: Your Star Ingredient
Not all vanilla beans are created equal. For truly exceptional vanilla bean ice cream, look for grade A (also called "black") Bourbon vanilla beans. These plump, oily pods from Madagascar have the highest vanillin content and the most complex flavor profile. Yes, they're expensive—a single bean can cost $5-10—but the difference is immediately noticeable in your finished ice cream.
When selecting beans, look for ones that are flexible rather than brittle, with a slight shine indicating high oil content. The best vanilla bean ice cream recipe deserves the best beans you can find. One fresh bean is sufficient for a quart of ice cream, though vanilla enthusiasts might opt for two.
Dairy Components: The Foundation of Creaminess
The ratio of fat to water in your dairy ingredients directly impacts the texture of your finished ice cream. Here's what you need:
- Heavy cream: Provides essential fat content (usually 36-40%) that creates richness and helps prevent ice crystals. Use the highest quality you can find, preferably not ultra-pasteurized.
- Whole milk: Balances the heaviness of cream while still contributing fat. Skim or low-fat milk will result in icier texture.
For vanilla bean ice cream recipe Cuisinart machine users, the typical ratio is 2 cups heavy cream to 1 cup whole milk, which creates the ideal fat percentage for home machines. KitchenAid attachment users might adjust slightly depending on the machine's churning power.
Sweeteners and Stabilizers: The Unsung Heroes
Sugar does more than sweeten—it lowers the freezing point of your mixture, which is crucial for scoopable texture. Granulated white sugar is standard, but consider these options:
- Regular granulated sugar: Clean, neutral sweetness that lets vanilla shine
- Portion of corn syrup: Prevents crystallization for smoother texture
- Touch of honey: Adds complexity and improves scoopability
A pinch of salt is non-negotiable—it enhances vanilla's complexity and balances sweetness. Some recipes also call for a tablespoon of vodka or bourbon, which lowers the freezing point for softer texture while amplifying vanilla flavor.
Equipment Essentials: Tools That Make the Difference
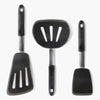
While our DI ORO silicone spatulas are my ride-or-die kitchen companions for scraping every precious drop of custard from your saucepan (and they're heat-resistant to 600°F, so no melting into your mixture!), you'll need a few other specialized tools to achieve ice cream perfection.
Ice Cream Makers: Choosing Your Churning Champion
The vanilla bean ice cream recipe Cuisinart fans swear by works because their machines freeze quickly, creating smaller ice crystals. The Cuisinart ICE-30BC is America's Test Kitchen's top pick for good reason—it consistently produces smooth results without breaking the bank.
For KitchenAid devotees, the vanilla bean ice cream recipe KitchenAid attachment works beautifully, especially if you pre-freeze the bowl for a full 24 hours (not just the recommended minimum). The advantage here is leveraging the power of your stand mixer's motor for thorough churning.
Regardless of machine choice, the key is rapid freezing while incorporating air—this creates the micro ice crystals essential for smooth texture.
Temperature Control: The Secret to Perfect Custard
If you're making French-style vanilla bean ice cream, temperature precision is critical. An instant-read digital thermometer is non-negotiable—custard perfection happens at exactly 77°C (170°F). Any hotter and you risk scrambled eggs; any cooler and your custard won't properly thicken.
For Philadelphia-style, you'll still want to monitor temperature to ensure you're not accidentally cooking off the vanilla's aromatic compounds, which can happen above 85°C (185°F).
Storage Containers: Protecting Your Precious Creation
After all your hard work, don't sabotage your vanilla bean ice cream with improper storage. Shallow, wide containers allow for faster freezing, which means smaller ice crystals and smoother texture. Look for insulated ice cream containers with tight-fitting lids—these maintain temperature better than regular plastic.
A pro tip from commercial kitchens: place a piece of parchment paper directly on the surface of your ice cream before putting the lid on. This prevents air exposure and those dreaded ice crystals that form during storage.
The Preparation Process: Starting Your Vanilla Bean Journey

Now that we understand the ingredients and equipment, let's begin the transformation process. The first critical step is properly handling your vanilla bean—the cornerstone of an authentic vanilla bean ice cream recipe.
Extracting Maximum Vanilla Flavor
Begin by placing your vanilla bean on a cutting board and using a sharp paring knife to split it lengthwise. The goal isn't to cut through completely but to open it like a book. Using the back (dull side) of your knife, scrape along the inside of the pod to extract those precious seeds—what pastry chefs call "vanilla caviar."
Here's where most recipes fall short: don't discard that pod! It contains tremendous flavor. Add both the seeds and the pod to your cream mixture during heating. Some chefs even suggest making a "vanilla bean paste" by finely mincing the pod after it's been used to infuse the cream, then incorporating it back into the mixture for maximum flavor and those beautiful specks throughout.
For the truly dedicated vanilla enthusiast, consider making a double-strength vanilla by using both a whole bean and a teaspoon of high-quality vanilla extract. The bean provides depth and complexity, while the extract offers immediate vanilla impact.
In part two, we'll dive into the detailed steps for both French and Philadelphia-style vanilla bean ice cream recipes, along with the crucial churning process that transforms your mixture into creamy perfection. We'll also explore troubleshooting tips for common ice cream challenges and share the professional secrets that elevate homemade vanilla bean ice cream from good to unforgettable.
The Preparation Process: Crafting Your Vanilla Bean Ice Cream Base
With your vanilla bean properly prepared, it's time to create the base that will become your dreamy frozen dessert. This is where the magic begins—and where having the right tools makes all the difference. Our DI ORO silicone spatulas are perfect companions here, allowing you to scrape every last bit of precious custard without introducing unwanted heat from your hands (unlike metal utensils).
Creating the Perfect French-Style Custard Base
The French-style vanilla bean ice cream recipe creates a custard so luxurious it might make you weep with joy. But let's be honest—it's also where things can go sideways if you're not careful. Here's how to nail it every time:
In a medium saucepan, combine 1 cup heavy cream, 1 cup whole milk, 3/4 cup granulated sugar, your scraped vanilla seeds, the empty pod, and a pinch of salt. Heat this mixture over medium-low heat, stirring occasionally with your DI ORO spatula until the sugar completely dissolves and tiny bubbles form around the edges—but don't let it boil!
While that's warming, whisk 5 large egg yolks in a separate bowl until they lighten in color. This is crucial for proper emulsification. Now comes the tricky part: tempering the eggs. Slowly add about 1/2 cup of the hot cream mixture to the yolks while whisking constantly. This gradually raises the eggs' temperature without scrambling them.
Pour the warmed egg mixture back into the saucepan with the remaining cream mixture, stirring constantly with your spatula. Cook over medium-low heat, stirring in a figure-eight pattern to ensure even heating. This is where your instant-read thermometer becomes your best friend—heat the custard to exactly 77°C (170°F). At this temperature, the custard will coat the back of your spatula, and when you run your finger through it, the line should hold.
Immediately remove from heat and strain through a fine-mesh sieve into a clean bowl. This catches any bits of cooked egg and ensures silky smoothness. Add the remaining cup of cold heavy cream to stop the cooking process. Return the vanilla bean pod to the mixture for continued flavor infusion.
Philadelphia-Style: The Simpler (But Still Spectacular) Approach
For those who want to skip the egg-tempering dance, the Philadelphia-style vanilla bean ice cream recipe delivers outstanding results with less fuss. It's particularly well-suited for the best vanilla bean ice cream recipe for Cuisinart machines, which excel with slightly lighter bases.
Combine 2 cups heavy cream, 1 cup whole milk, 3/4 cup granulated sugar, vanilla bean seeds, the pod, and a pinch of salt in a medium saucepan. Warm over medium heat just until the sugar dissolves completely and the mixture is hot but not simmering (about 75°C or 165°F).
Remove from heat, cover, and let steep for at least 30 minutes—though true vanilla enthusiasts might let it infuse overnight in the refrigerator for intensified flavor. The longer steep time compensates for the lack of egg yolks, which normally trap and hold vanilla compounds.
After steeping, remove the vanilla pod (you can rinse, dry, and bury it in a container of sugar to make vanilla sugar—waste not, want not!). No straining is necessary for this method unless you prefer to remove the vanilla bean specks (but why would you?). The visual evidence of real vanilla is part of the charm!
Chilling Strategies: The Critical Step Most Recipes Overlook
Here's where patience becomes your secret ingredient. Proper chilling is non-negotiable for exceptional texture, regardless of whether you're making a French vanilla bean ice cream recipe or the Philadelphia-style version.
Rapid Cooling Techniques for Better Texture
The faster you cool your base, the better your final texture will be. Professional ice cream makers use specialized equipment, but you can approximate their results with an ice bath. Fill a large bowl with ice and water, then nest your bowl of ice cream base in it. Stir occasionally with your DI ORO spatula until the mixture cools to room temperature.
Once cooled, cover the surface directly with plastic wrap (pressing it onto the surface to prevent a skin from forming) and refrigerate for at least 4 hours—though overnight is ideal. This "aging" period allows proteins to relax, fat to crystallize, and flavors to develop fully.
For the scientifically inclined, aim for a base temperature of 38°F (3°C) before churning. This gives your ice cream maker the best chance of creating those micro ice crystals that define professional-quality ice cream. For a more technical dive into the science behind ice cream crystallization, check out this authoritative resource.
Pre-Freezing Your Machine: Don't Skip This Step!
Whether you're following a vanilla bean ice cream recipe for KitchenAid attachment or using a Cuisinart dedicated machine, proper pre-freezing is essential. Most home ice cream makers rely on a gel-filled bowl that must be frozen solid before use.
For optimal results, freeze your machine's bowl for a full 24 hours—even if the manufacturer suggests less time. Place it in the coldest part of your freezer and don't remove it until the moment you're ready to churn. If you can't hear liquid sloshing when you shake it, you're good to go.
This extended freezing time ensures your machine maintains the coldest possible temperature throughout the churning process, resulting in smaller ice crystals and creamier texture.
The Churning Process: Transforming Liquid to Luxury

Now comes the exciting part—watching your vanilla bean ice cream recipe come to life as it transforms from liquid to frozen perfection. This process is both science and art, requiring attention to detail and a bit of intuition.
Optimal Churning Techniques for Different Machines
Remove your thoroughly chilled base from the refrigerator and give it a quick stir with your DI ORO spatula to ensure even consistency. If you're using a vanilla bean ice cream recipe for Cuisinart machines, assemble the frozen bowl, paddle, and lid according to manufacturer instructions before pouring in your base.
For KitchenAid attachment users, attach the frozen bowl to your stand mixer, insert the dasher, lock the drive assembly, and then pour in your base. Start the machine immediately—exposure to room temperature begins thawing your frozen bowl instantly.
The churning time varies by machine and recipe, but typically takes 20-30 minutes. You're looking for the consistency of soft-serve ice cream—thick enough to hold its shape but still slightly soft. The volume should increase by about 25-30% as air incorporates into the mixture.
A word of caution: don't over-churn! There's a sweet spot where the ice cream is perfectly aerated but not yet butter. When the mixture stops moving freely and starts climbing up the dasher, it's time to stop.
Visual Cues That Your Ice Cream Is Ready
How do you know when your vanilla bean ice cream is perfectly churned? Look for these telltale signs:
- The mixture pulls away from the sides of the bowl
- Tracks from the dasher remain visible for several seconds
- When you lift the dasher, the ice cream clings to it rather than dripping off
- The surface has a matte rather than glossy appearance
If you're following the best vanilla bean ice cream recipe traditions, you'll notice those beautiful specks of vanilla bean distributed evenly throughout the pale yellow base—visual proof of the flavor awaiting your taste buds.
Hardening and Storage: Preserving Your Creamy Creation
Freshly churned ice cream has the consistency of soft-serve and requires proper hardening to develop that scoopable texture we associate with premium ice cream. This final freezing stage is where many homemade efforts falter—but not yours.
Preventing Ice Crystals During Hardening
Working quickly with your DI ORO spatula (its flexible edge is perfect for this task), transfer your churned ice cream to a pre-chilled, shallow container. The pre-chilling prevents the edges from melting on contact, while the shallow shape allows for faster freezing—remember, faster freezing equals smaller ice crystals.
For ultra-smooth results, consider this professional technique: press a piece of parchment paper directly onto the surface of your ice cream before securing the lid. This prevents air exposure, which is the primary cause of those crunchy ice crystals that develop during storage.
Place your container in the coldest part of your freezer, typically the back of the bottom shelf. Avoid the door, where temperature fluctuations occur with each opening. Allow at least 4 hours for proper hardening—though the anticipation might feel like torture!
Finding the Optimal Serving Temperature
Here's a secret that separates ice cream aficionados from amateurs: premium ice cream isn't meant to be eaten straight from the freezer. Most home freezers operate at around 0°F (-18°C), which is too cold for optimal ice cream enjoyment.
For the perfect scoop of your French vanilla bean ice cream recipe creation, transfer it to the refrigerator for 10-15 minutes before serving, or let it sit at room temperature for 5-8 minutes. This slight warming allows the frozen fat molecules to relax, releasing trapped flavor compounds and achieving that perfect creamy-yet-firm consistency.
When scooping, warm your ice cream scoop in hot water between each serving. This creates the beautiful, curl-edged scoops you see in ice cream shops and prevents the ice cream from sticking to the scoop.
Troubleshooting Common Vanilla Bean Ice Cream Challenges
Even with the best vanilla bean ice cream recipe and technique, occasional challenges arise. Here's how to diagnose and solve the most common homemade ice cream issues:
Texture Problems Solved: From Icy to Gummy
If your ice cream turns out icy or coarse, several factors might be at play. Insufficient fat content is a common culprit—this is why recipes specifying "heavy cream" shouldn't be made with half-and-half or light cream. The fat in cream creates smaller ice crystals and smoother texture.
For overly dense or gummy ice cream, you likely over-churned, causing the fat molecules to clump together like butter. The solution is simple: stop churning when the mixture reaches soft-serve consistency, even if it seems too soft.
If your ice cream becomes rock-hard during storage, try adding a tablespoon of alcohol (vodka works well as it's flavorless) or replacing some sugar with corn syrup or honey. These ingredients lower the freezing point, resulting in softer, more scoopable ice cream even after extended freezing.
For more insights into the science behind texture and troubleshooting, this in-depth ice cream science activity can be a helpful resource.
Flavor Enhancement for Vanilla Bean Perfection
If your vanilla flavor seems muted, consider these professional intensification techniques:
- Use both vanilla bean and extract—they contain different flavor compounds that complement each other
- Add a tiny pinch of salt to your final churned ice cream to amplify vanilla notes
- Try splitting and scraping two vanilla beans instead of one for more pronounced flavor
- Experiment with different vanilla varieties—Tahitian vanilla offers floral notes while Mexican provides spicier undertones
For those following a vanilla bean ice cream recipe Cuisinart or KitchenAid specific instructions often suggest slightly different vanilla proportions based on how each machine incorporates air—don't be afraid to adjust to your taste preference.
Serving Suggestions: Elevating Your Vanilla Bean Creation

Exceptional vanilla bean ice cream deserves thoughtful presentation. While it's divine on its own, consider these serving ideas that highlight its creamy perfection:
Classic Pairings That Never Disappoint
Warm fruit desserts and vanilla bean ice cream create a temperature and texture contrast that's simply magical. Try your homemade creation alongside:
- Apple pie still warm from the oven
- Peach cobbler with its juices bubbling around the edges
- Chocolate brownies with their crisp top and fudgy center (banana pudding brownies are another decadent option for pairing!)
- Fresh berries macerated with a touch of sugar and balsamic vinegar
For an elegant dinner party finale, serve small scoops in chilled espresso cups with a crisp cookie perched alongside—simple yet sophisticated.
Creative Serving Vessels and Garnishes
The vessel you choose can elevate your vanilla bean ice cream experience. Pre-chilled metal bowls maintain temperature longer than ceramic or glass. For a rustic presentation, serve scoops in mason jars with a sprinkle of vanilla sugar and a fresh mint leaf.
Consider creating an ice cream sandwich with thin slices of pound cake, or hollow out strawberries to create edible serving cups for tiny scoops of your French vanilla bean ice cream recipe masterpiece.
For the ultimate presentation, split a fresh vanilla bean lengthwise and use it as a garnish alongside your scoop—a visual reminder of the real vanilla that makes your homemade version extraordinary.
In our final installment, we'll explore advanced techniques for vanilla bean ice cream variations, share professional chef secrets for customization, and discuss how to adapt your recipe for different dietary needs without sacrificing that luxurious texture and flavor that makes homemade vanilla bean ice cream worth every minute of effort.
Advanced Variations and Customizations: Making It Your Own
Now that you've mastered the basics of exceptional vanilla bean ice cream, let's explore how to put your personal stamp on this classic. The beauty of homemade ice cream lies in customization—taking a foundational vanilla bean ice cream recipe and transforming it into something uniquely yours.
Adding Mix-Ins Strategically
The key to successful mix-ins is timing and temperature. Add them too early, and they'll sink to the bottom; too late, and they won't incorporate properly. The sweet spot? When your ice cream reaches soft-serve consistency in the final minutes of churning.
For chocolate lovers, try folding in hand-chopped chocolate rather than uniform chips—the irregular pieces create delightful texture variations. Our DI ORO silicone spatula makes this folding process effortless, with its flexible edge reaching every corner of your ice cream container without introducing unwanted heat from your hands.
Consider these gourmet mix-in combinations that complement the complex flavor of real vanilla beans:
- Salted caramel swirls with toasted pecans
- Ribbons of homemade berry compote
- Chunks of brownies with a touch of espresso powder
- Candied orange peel and dark chocolate flakes
For swirls and ribbons, layer them between portions of freshly churned ice cream rather than mixing directly—this preserves their distinct appearance and prevents them from disappearing into the base.
Looking for dairy-free inspiration? Try our coconut sorbet recipe for a refreshing alternative that uses similar techniques and brings tropical flavors to your homemade frozen desserts.
Dietary Adaptations Without Compromise
Creating exceptional vanilla bean ice cream doesn't have to be limited by dietary restrictions. With thoughtful substitutions, you can accommodate various needs while maintaining that luxurious texture.
For dairy-free versions, full-fat coconut milk and coconut cream create a remarkably rich base that complements vanilla beautifully. The subtle coconut flavor actually enhances the tropical notes naturally present in vanilla beans. Add 1 tablespoon of vodka to improve scoopability without affecting flavor.
For lower sugar options, try monk fruit sweetener or allulose rather than artificial sweeteners—they freeze more like sugar without the aftertaste. Remember that sugar affects not just sweetness but also texture, so you may need to add a tablespoon of vegetable glycerin to maintain creaminess.
Egg-free adaptations are straightforward with the Philadelphia-style base, but for those wanting the richness of French-style without eggs, try adding 2 tablespoons of cream cheese to your base. It provides similar emulsification properties and contributes a pleasant tanginess that balances the vanilla's sweetness.
Professional Chef Secrets for Vanilla Bean Excellence
What separates good homemade vanilla bean ice cream from truly exceptional creations? Often it's subtle techniques that professional pastry chefs have honed through years of experience. Let's pull back the curtain on some of these trade secrets.
Vanilla Bean Selection and Preparation
The variety of vanilla bean you choose significantly impacts your final flavor profile. While many recipes simply call for "vanilla beans," professionals know that different varieties offer distinct characteristics:
- Madagascar (Bourbon) vanilla beans provide the classic, rich vanilla flavor most people associate with premium ice cream
- Tahitian beans offer floral, fruity notes that create more complex undertones
- Mexican beans contribute spicier, woodier notes that pair beautifully with cinnamon or chocolate additions
For maximum flavor extraction, try this chef technique: after splitting and scraping your bean, chop the empty pod into small pieces and pulse in a spice grinder with a portion of your recipe's sugar. This "vanilla sugar" captures every bit of flavor from the expensive beans—an approach that's both economical and flavor-enhancing.
Emulsion Techniques for Silkier Texture
Professional ice cream makers know that proper emulsion—the suspension of fat molecules in the water-based ingredients—is crucial for that silky-smooth mouthfeel. After chilling your base but before churning, use an immersion blender for 30 seconds to create a more perfect emulsion.
Another professional technique: after your custard has chilled completely, process it in a standard blender for 30 seconds, then strain again before churning. This additional step breaks down any remaining fat molecules that may have clumped during cooling, resulting in extraordinarily smooth ice cream.
For the ultimate in professional-quality texture, some chefs add a tiny amount (1/4 teaspoon) of lecithin to their base. This natural emulsifier helps maintain that perfect suspension of fat molecules even through the freezing process. For a comprehensive look into the food science behind these techniques, see this detailed research paper on ice cream emulsification.
Perfect Pairings: Complementing Your Culinary Creations

Exceptional vanilla bean ice cream deserves equally thoughtful companions. Whether you're serving it alongside other desserts or creating a composed plate, consider these pairing principles that highlight your frozen masterpiece.
Temperature and Texture Contrasts
The magic of vanilla bean ice cream often lies in contrast—cold against warm, smooth against crunchy. This is why warm apple pie with cold ice cream creates such a satisfying experience. Explore these professional-level contrasts:
- Serve your French vanilla bean ice cream alongside warm chocolate lava cake, allowing the cold ice cream to firm the cake's molten center as they meet on the spoon
- Pair with crisp tuile cookies or brandy snaps for textural contrast
- Create a "hot and cold" effect with freshly made espresso poured over a scoop (affogato-style)
For dinner parties, try this chef trick: pre-scoop your vanilla bean ice cream onto a parchment-lined tray and refreeze until serving time. This allows you to plate desserts quickly without struggling with rock-hard ice cream in front of guests.
Complementary Flavor Profiles
Vanilla contains over 250 flavor compounds, making it incredibly versatile for pairing. Consider these sophisticated combinations:
- Acidic fruits like raspberries or passion fruit that cut through cream's richness
- Bitter elements like dark chocolate or coffee that highlight vanilla's sweetness (frozen coffee drinks are especially refreshing with a scoop of vanilla bean ice cream!)
- Herbal notes from fresh basil, lemon thyme, or lavender that enhance vanilla's floral qualities
- Caramelized elements like brûléed bananas that complement vanilla's natural caramel undertones
For a signature dessert, try creating a vanilla flight: serve small scoops of your homemade vanilla bean ice cream alongside commercial varieties to showcase how dramatically superior real vanilla beans and proper technique can be.
Storing for Longevity: Preserving Your Frozen Masterpiece
You've invested time, premium ingredients, and loving attention in your vanilla bean ice cream—now let's ensure it maintains its exceptional quality for as long as possible.
Preventing Freezer Burn and Texture Degradation
Homemade ice cream lacks the commercial stabilizers that protect store-bought varieties, making proper storage crucial. The enemy of great texture is air exposure and temperature fluctuation.
For optimal storage, transfer your ice cream to shallow, wide containers rather than deep ones. This minimizes the amount of air trapped inside and allows for faster freezing. Press a piece of plastic wrap directly onto the surface before securing the lid—this double protection prevents ice crystals from forming on top.
Store your containers at the back of the freezer where temperature remains most consistent. Each time ice cream partially thaws and refreezes, larger ice crystals form, degrading that smooth texture you worked so hard to achieve.
For serious ice cream enthusiasts, consider investing in dedicated ice cream storage containers with insulated walls and tight-fitting lids. These specialized containers maintain more consistent temperatures and prevent odor absorption from other foods. You can find options in our Seamless Series collection, designed for kitchen perfectionists.
The Optimal Consumption Timeline
Unlike commercial ice creams loaded with stabilizers, homemade vanilla bean ice cream has a prime window of enjoyment. While it remains safe to eat for much longer, the optimal texture and flavor experience follows this timeline:
- Days 1-3: Peak flavor and texture—the vanilla is vibrant and the mouthfeel is at its creamiest
- Days 4-7: Still excellent, with slightly more pronounced vanilla flavor as it continues to infuse
- Days 8-14: Good quality with gradual texture changes becoming noticeable
- Beyond 2 weeks: Best used in milkshakes or as an accompaniment to warm desserts where texture changes are less noticeable
If you've made a large batch, consider portioning some into smaller containers for later use. This way, you only expose what you'll consume immediately to temperature changes, preserving the remainder in optimal condition. For more kitchen storage tips and clever product ideas, explore our new products collection.
The Joy of Vanilla Bean Mastery
Creating exceptional vanilla bean ice cream at home is more than following a recipe—it's embracing the art and science of flavor
Frequently Asked Questions
What makes vanilla bean ice cream different?
Vanilla bean ice cream stands out because it uses real vanilla beans or vanilla bean paste, which contains the tiny seeds from the vanilla pod. These seeds add a rich, natural flavor and a beautiful speckled appearance that you won’t get from plain vanilla extract. It’s all about that authentic, deep vanilla taste and a touch of elegance in every scoop.
How is vanilla bean ice cream made?
Vanilla bean ice cream is typically made by infusing cream and milk with scraped vanilla bean seeds and the pod itself, allowing the flavors to meld. The mixture is then sweetened, chilled, and churned in an ice cream maker to create a smooth, creamy texture. The result is a luscious treat bursting with natural vanilla flavor and those signature black flecks.
When to add vanilla bean paste to ice cream?
Vanilla bean paste should be added to the ice cream base during the initial mixing stage, along with the cream and milk. Adding it early allows the sweet, aromatic vanilla flavor to fully infuse throughout the mixture before it’s chilled and churned. This ensures every bite is packed with that iconic vanilla bean goodness.
How to make 3 ingredient ice cream?
You can make simple 3-ingredient ice cream by combining heavy cream, sweetened condensed milk, and vanilla extract or vanilla bean paste. Whip the heavy cream until stiff peaks form, gently fold in the condensed milk and vanilla, then freeze until firm. It’s a quick, no-churn recipe that’s creamy, sweet, and perfect for when you want homemade ice cream without the fuss.
Why is tillamook ice cream different?
Tillamook ice cream is different because it’s made with high-quality, natural ingredients like fresh cream and milk from local farms, giving it a rich and creamy texture. Their commitment to traditional crafting methods and avoiding artificial additives results in a pure, indulgent flavor that stands out in every scoop. Plus, their vanilla ice cream captures a genuine, robust vanilla taste that fans love.
What are the ingredients in Tillamook vanilla ice cream?
Tillamook vanilla ice cream ingredients include cream, skim milk, sugar, egg yolks, natural vanilla flavor, and vanilla bean specks. They carefully select these simple, wholesome ingredients to ensure a creamy texture and authentic vanilla taste without unnecessary additives. This clean ingredient list is part of what makes Tillamook a trusted favorite.